Appearance
Creating your Vim Canvas™️ application
As an application developer, you can create your Vim Canvas™️ application from the Applications tab to interact with the SDK. Here, you can create and manage applications, as well as set store listings and permissions on the application manifest page. To get started:
- Click on the Applications tab.
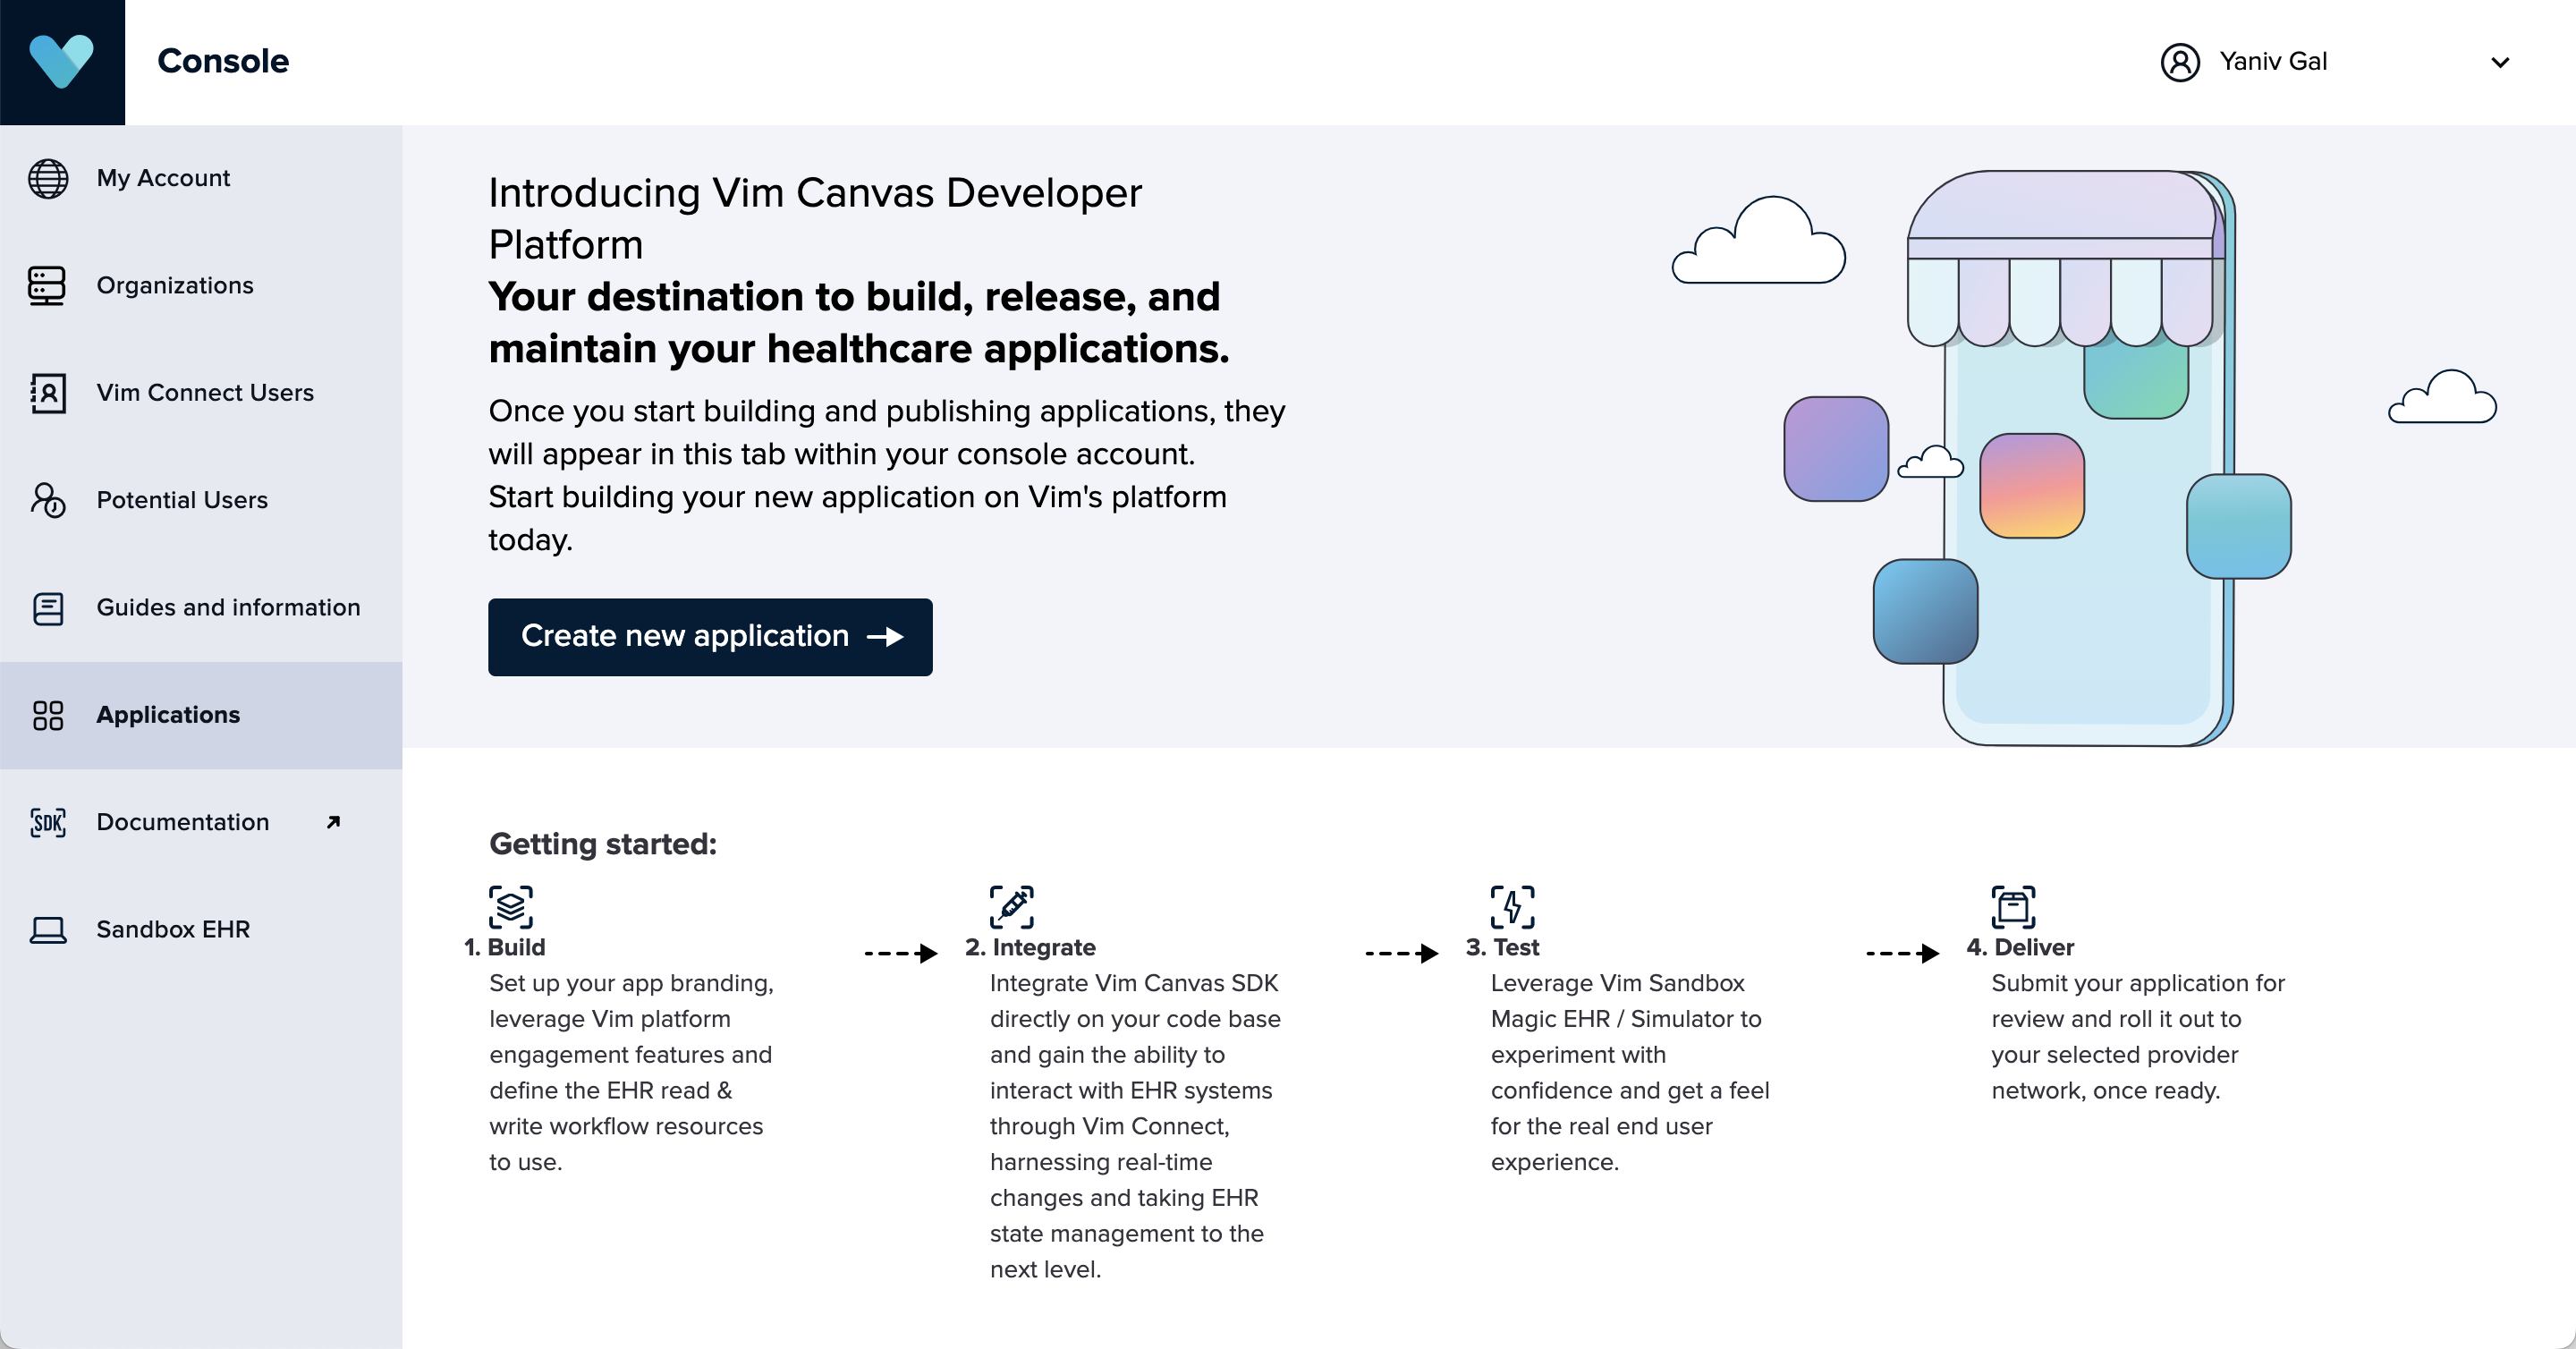
- Click on Create new application.
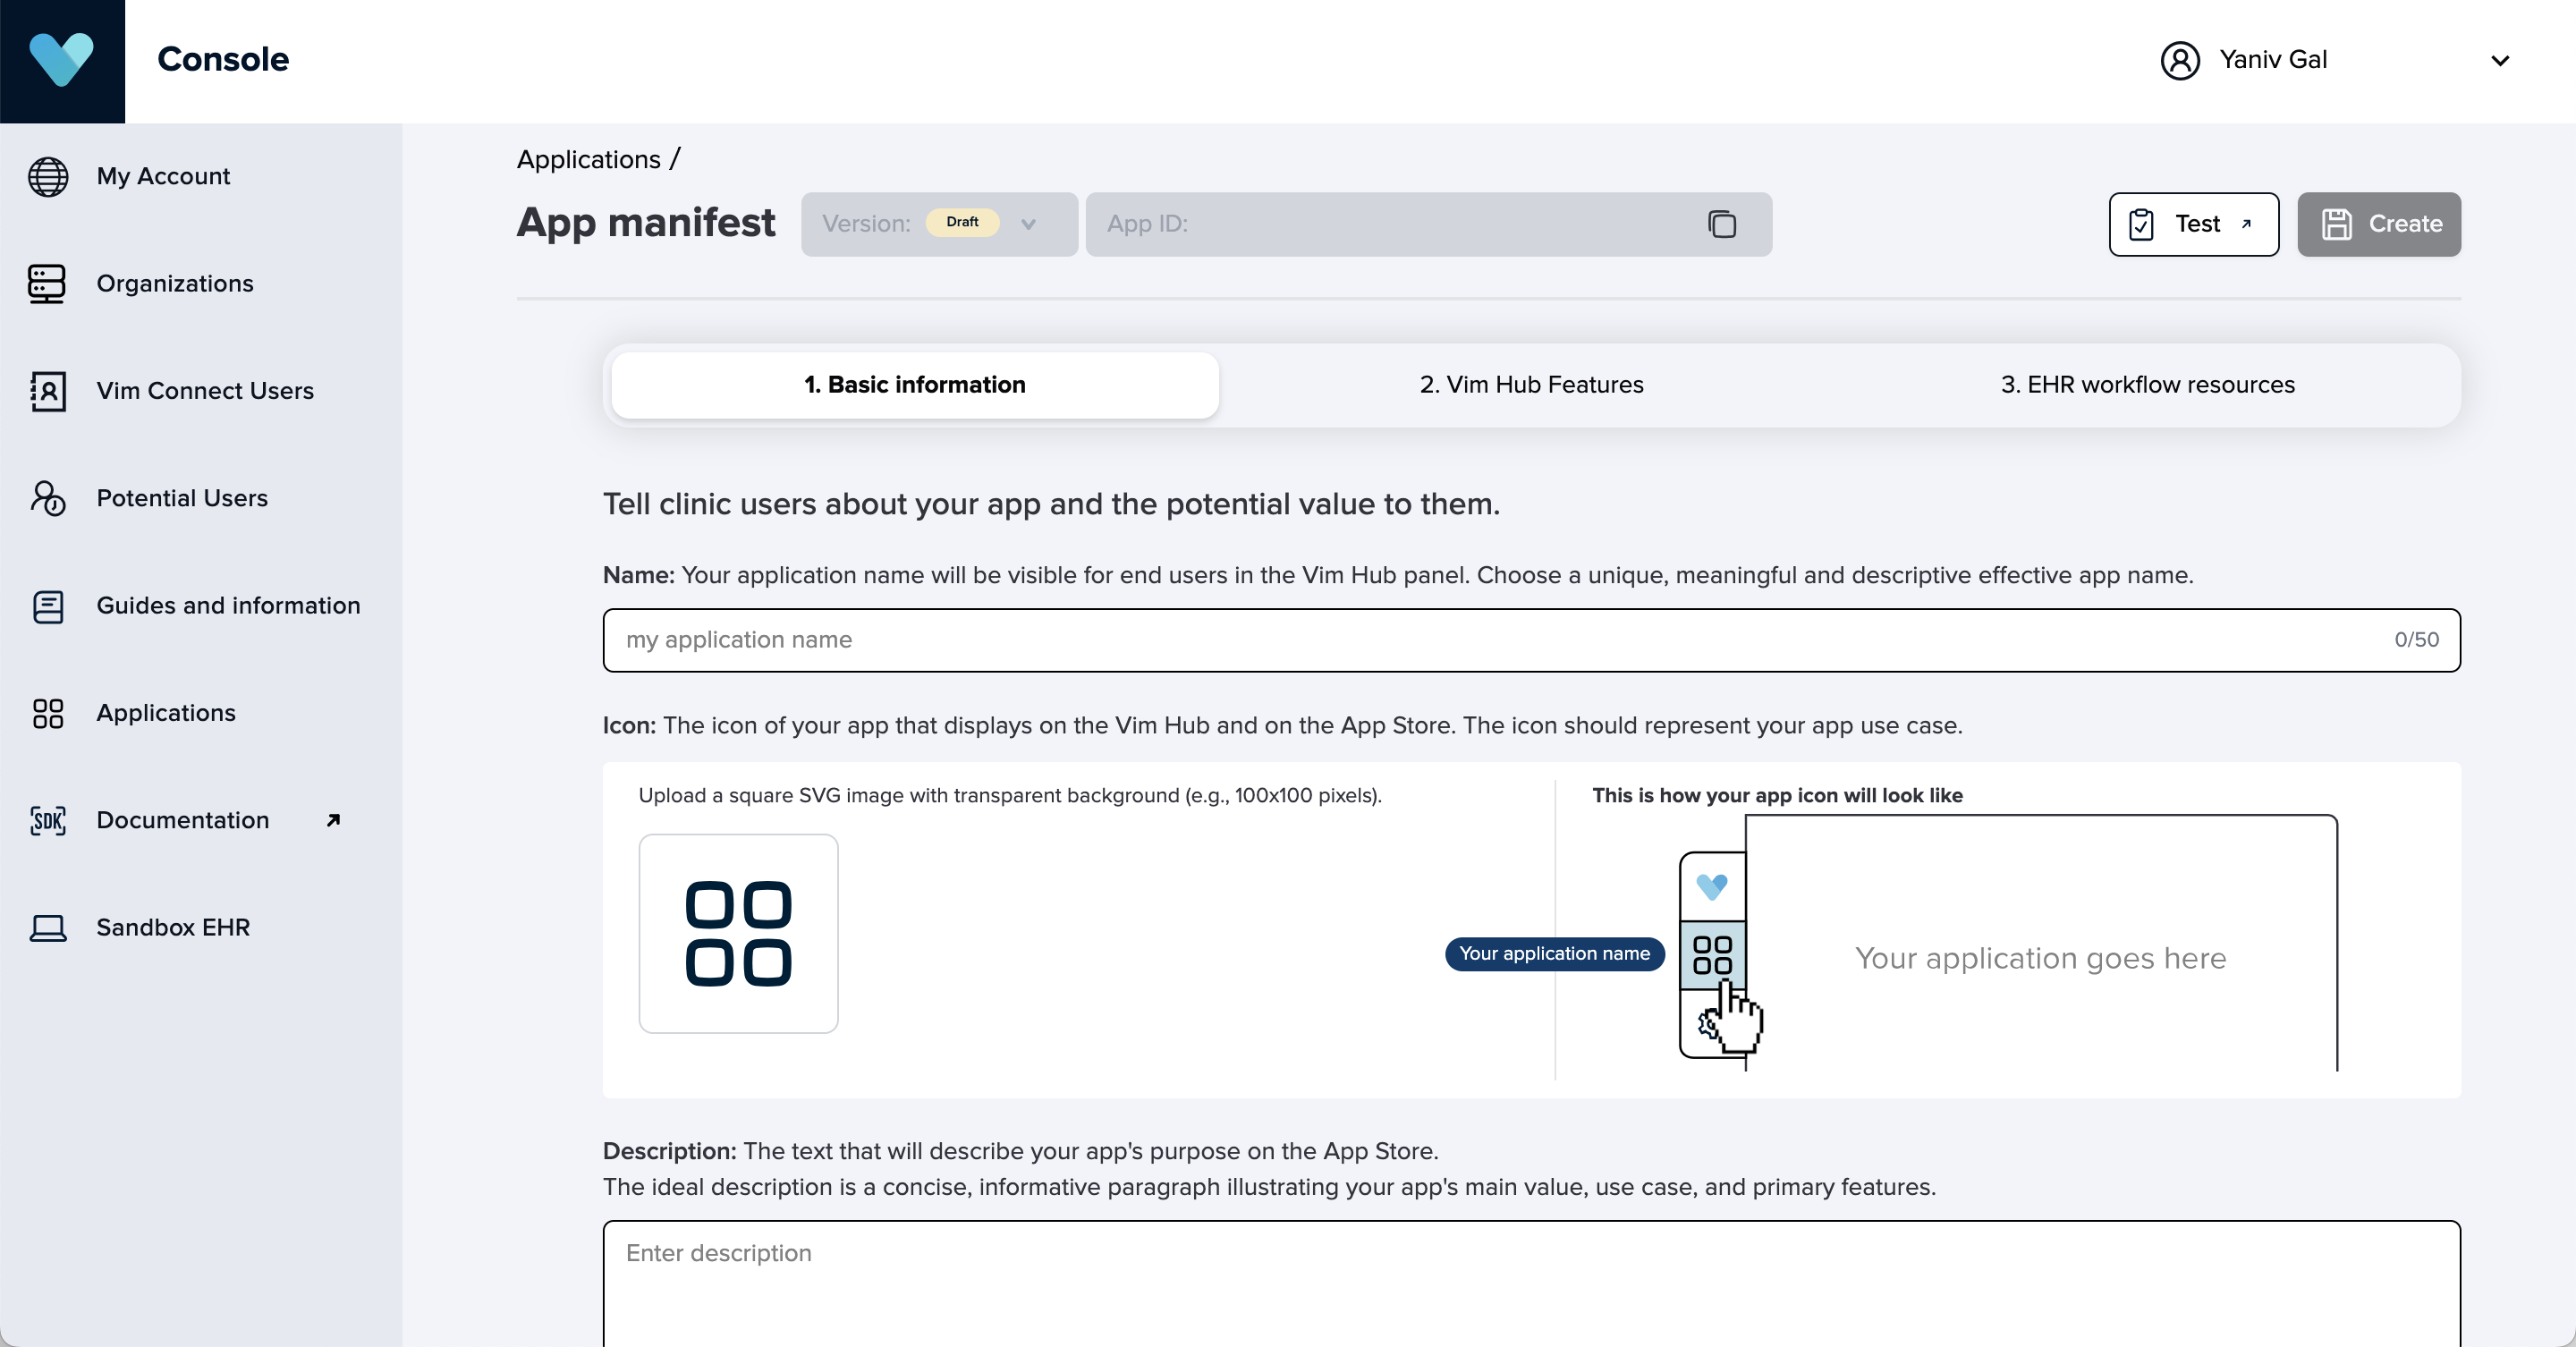
- You will access the application manifest page.
Setting your application manifest
As an application developer user, you need to create your applications and set your application manifest in order to start testing it. The application manifest has 4 main sections:
- Information
- Vim Hub
- EHR workflow resources
- API
1. Information
From the Information tab, you can set up the following:
- Name (required): Your application name will be visible to end users on their Vim Console and on Vim Connect within the EHR. Your application name identifies your application on the Vim Connect overlay when hovering over your application (if you have not set any dynamic tooltip text), on push notifications as well as on the Vim Console for clinic account admin users. a.Specs: Up to 50 latin characters.
- Icon: Your application icon will appear in multiple locations, including the Vim Connect overlay, push notifications, and the Vim Console for clinic admin users.
a. Specs: A square (100 x 100 pixels for example), SVG format, with a transparent background (no colored) background.
b. If you don’t upload any icon, we will display a default 4 squares icon.
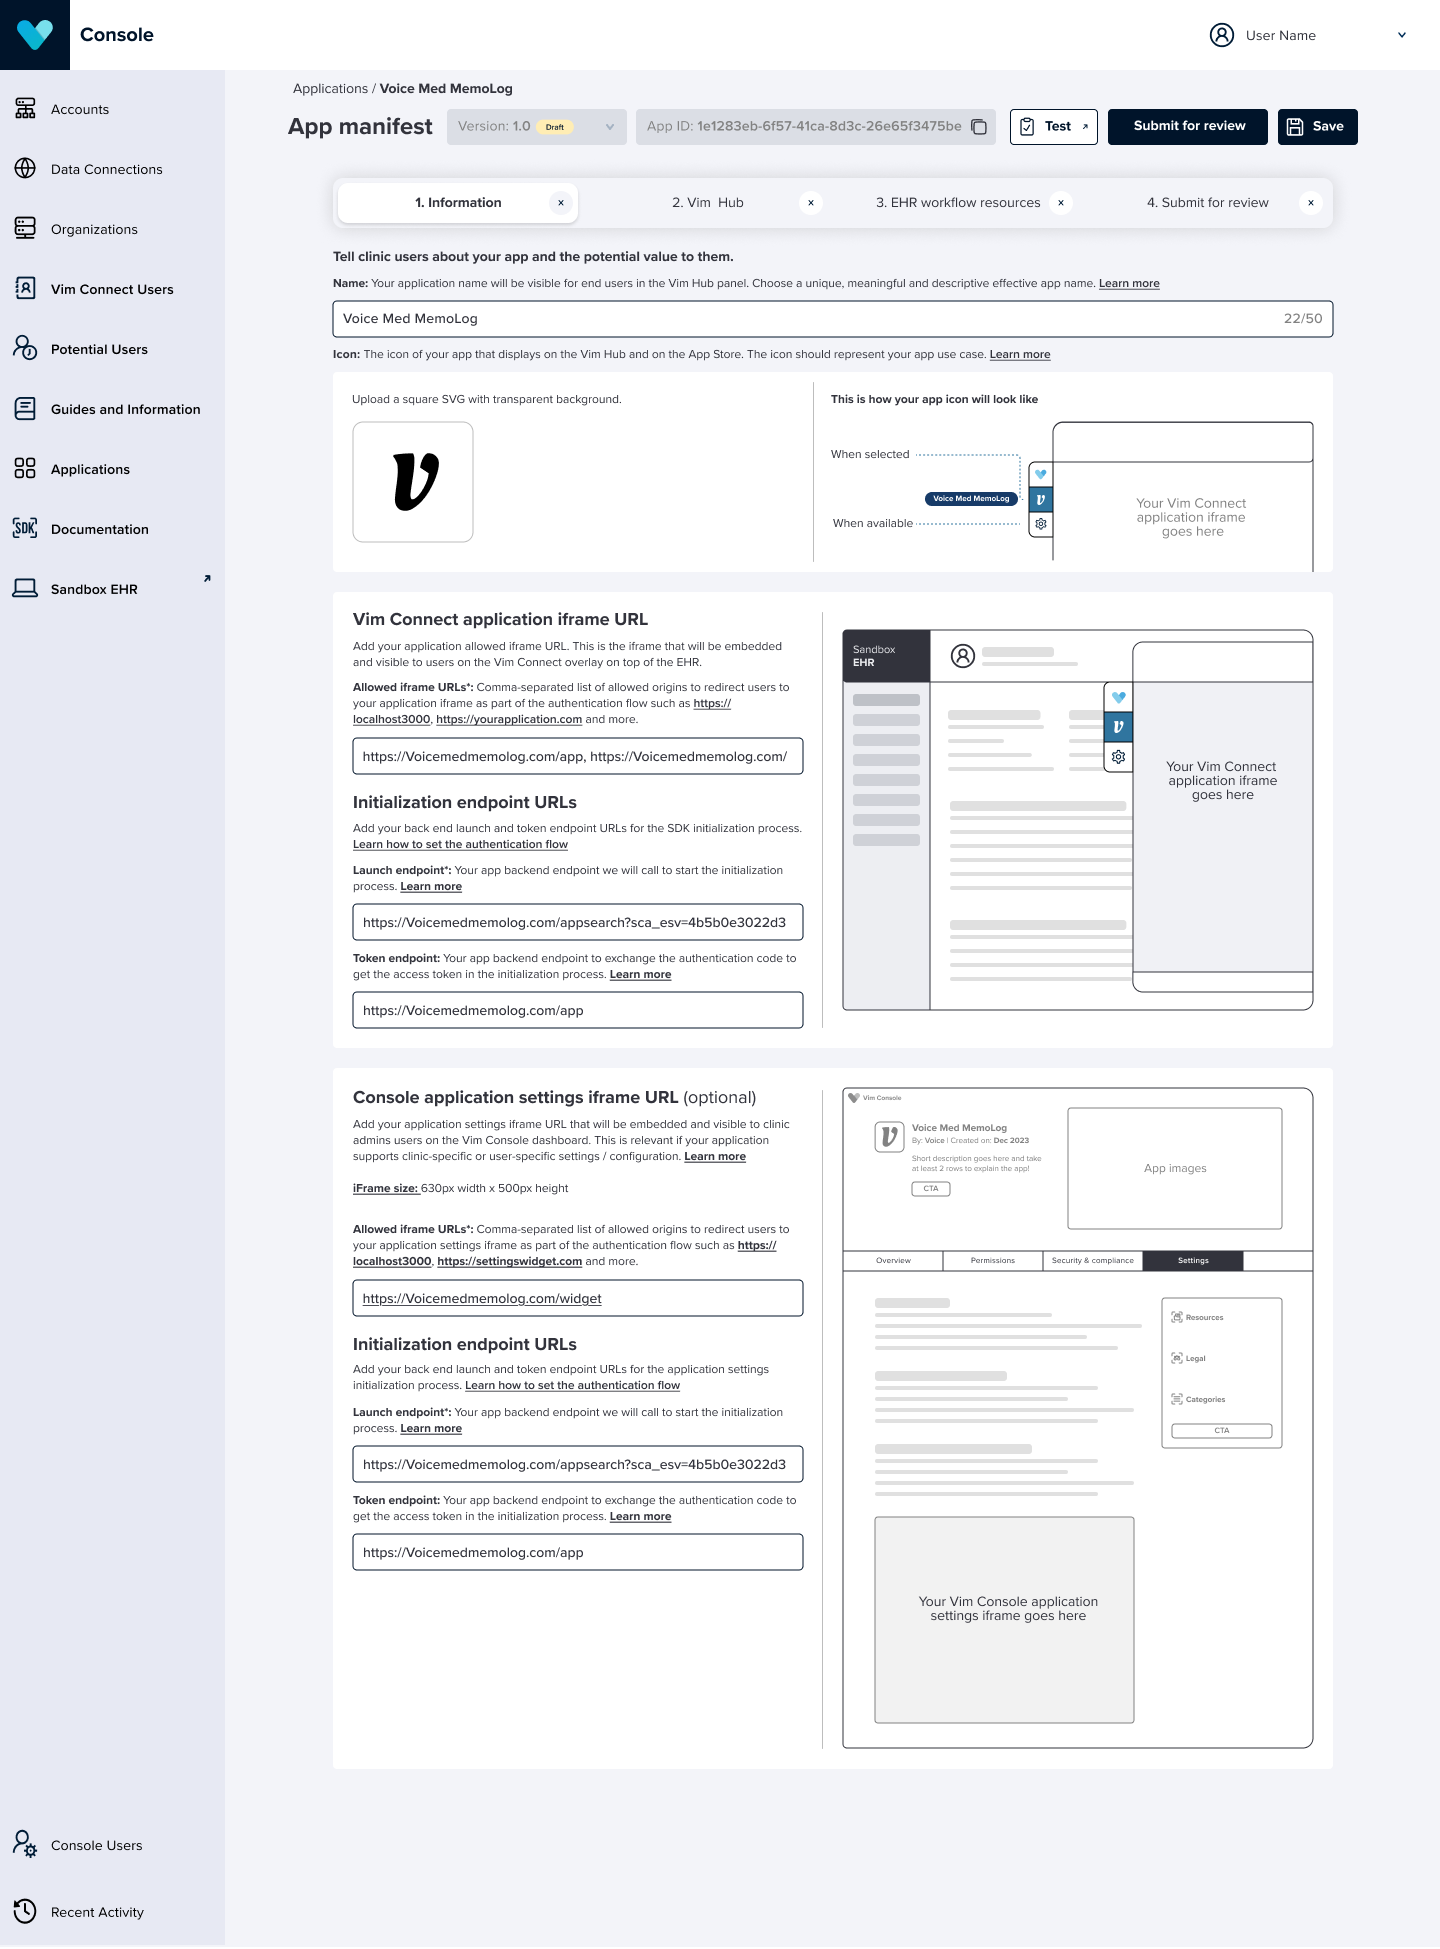
Vim Connect application iframe URLs
- Allowed iframe URLs (required): A comma-separated list of urls from trusted domains you own which are permitted to be embedded in your application iframe. This ensures that the iframe content originates from a secure and verified source and must match the domain section of the full url you return on the launch endpoint as the
redirect_uriresponse parameter in the authentication flow. These urls can behttp://localhost:3000,https://yourapplication.comor any other url you want to return as theredirect_uri.note
TIP
The allowed
iframe urlandredirect_urican be different as long as they share the same domain. The exact url that controls the iframe url that will be shown to the end user is theredirect_uri. For more details, refer to the section in the authentication section. - Launch endpoint (required): This is the initial endpoint called during the authentication flow. This endpoint should redirect to the Vim authorization endpoint and pass along the app's frontend redirect URI. For more details, refer to the section in the implementation guide.
- Token endpoint (required): This is the OAuth2 endpoint used during the authentication process. It allows you to exchange the authorization code for an access token, which is necessary to access Vim EHR resources, and also provides an ID token for application usage. For more details, refer to the section in the implementation guide.
Console Settings Application iframe URLs (optional)
note
TIP
This section is optional but requires all fields to be completed if you choose to implement it.
- Allowed iframe URLs: Similar to the Vim Connect application iframe URLs, specify the trusted domains for your application settings URLs.
- Launch endpoint: The authentication initiation endpoint for your Settings Application.
- Token endpoint: The OAuth2 endpoint for authentication token exchange in your Settings Application.
Implementation:
To implement the Settings Application, please follow the steps in Creating your Settings Application.
As an app developer, you can follow these steps to test your app settings integration:
Testing:
- Configure your Settings Application URLs in your application version manifest.
- Navigate to the store listing preview from the Preview Store Page link found in the manifest submission review modal.
- Locate your Settings Application interface in the iframe under the settings section. Organization administrators can configure relevant settings for their organization here.
- Log in to the sandbox EHR, verify that your main application correctly reflects the settings configured for each specific organization.
For example, here the app developer identifies the specific organization in context for his Vim Connect application iframe and loads the application with a customized color for the organization with the "blue" color instead of the default "green" color.
Customized color

Default color

Manifest preview
2. Vim Hub
From the Vim Hub tab, you can set up the following:
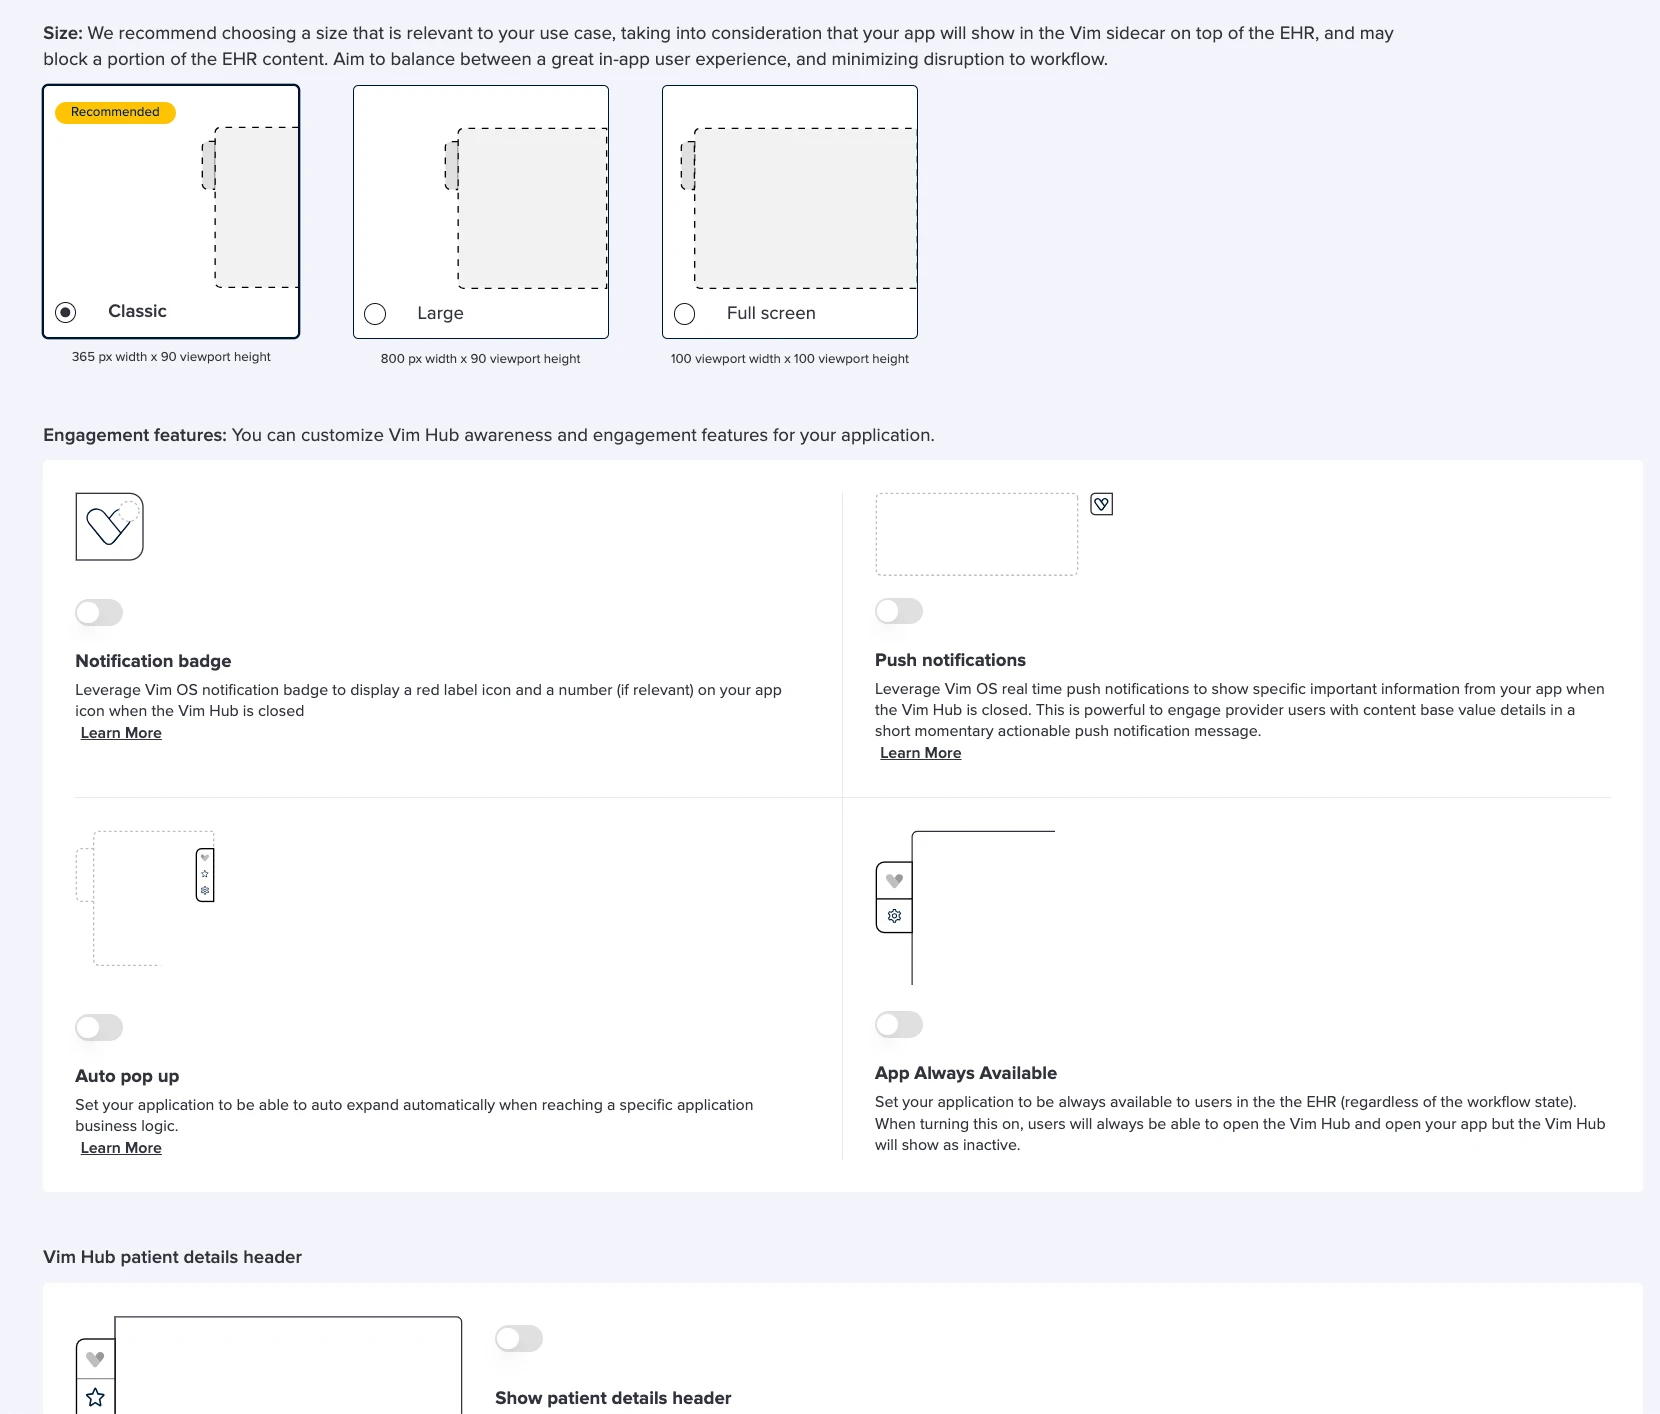
- Size: Set the default size for your application in Vim Connect, keeping in mind that it will overlay the EHR. Choose a size that enhances user experience while minimizing disruption to workflow. You can choose from the following options:
a. Classic: Ideal for most of the use cases. Allow end users to interact with your application and the EHR at the same time. Specs: 365 px width x 90 viewport height
b. Large: Recommended for applications that display large dataset tables that may need to require more real estate. Specs: 800 px width x 90 viewport height
c. Full screen: Recommended only for application that need to supplement the provider workflow. Use this with caution as this view will not allow the user to interact with the EHR when your application is open, as it will cover most of the user's screen. Specs: 100 viewport width x 100 viewport height - Notification badge: Utilize the Vim OS notification badge to display a red icon with a number on your app when the Vim Hub is open or closed. You can choose to keep the badge visible during app use or specific actions. For more details, refer to the section in the Notification badge implementation guide.
- Push notification: Display real-time push notifications to share important information from your app when the Vim Hub is closed, engaging clinicians with brief, actionable messages. For more details, refer to the section in the Push notification implementation guide.
- Auto popup: You can configure your application to auto-expand when it reaches specific business logic. For more details, refer to the section in the Auto popup implementation guide.
- App always available: You can make your application always available in the EHR, allowing users to access the Vim Hub regardless of workflow state. However, the Vim Hub will appear inactive (gray). If your application needs to be consistently available to users regardless of patient or workflow context, you can set it as “always available” in the application manifest, ensuring access as soon as users log in to the EHR.
- Important: When you enable your application with the "always available" feature in the manifest, your application's icon will always show as enabled. However, the Vim Hub heart icon will remain disabled regardless of your application state, to avoid user fatigue. Users can hover over it to see and access your application. You can use all Vim Hub engagement features, such as push notifications and notification badges, to interact with end users.
- Vim hub patient header: The patient details header appears at the top of the Vim Hub and your application, displaying the current patient’s first name, last name, date of birth, age, and insurance name. This is recommended to provide context for providers interacting with patient-specific data. If your application displays generic data or already includes these details within the iframe, you may choose to disable the header.
3. EHR workflow resources
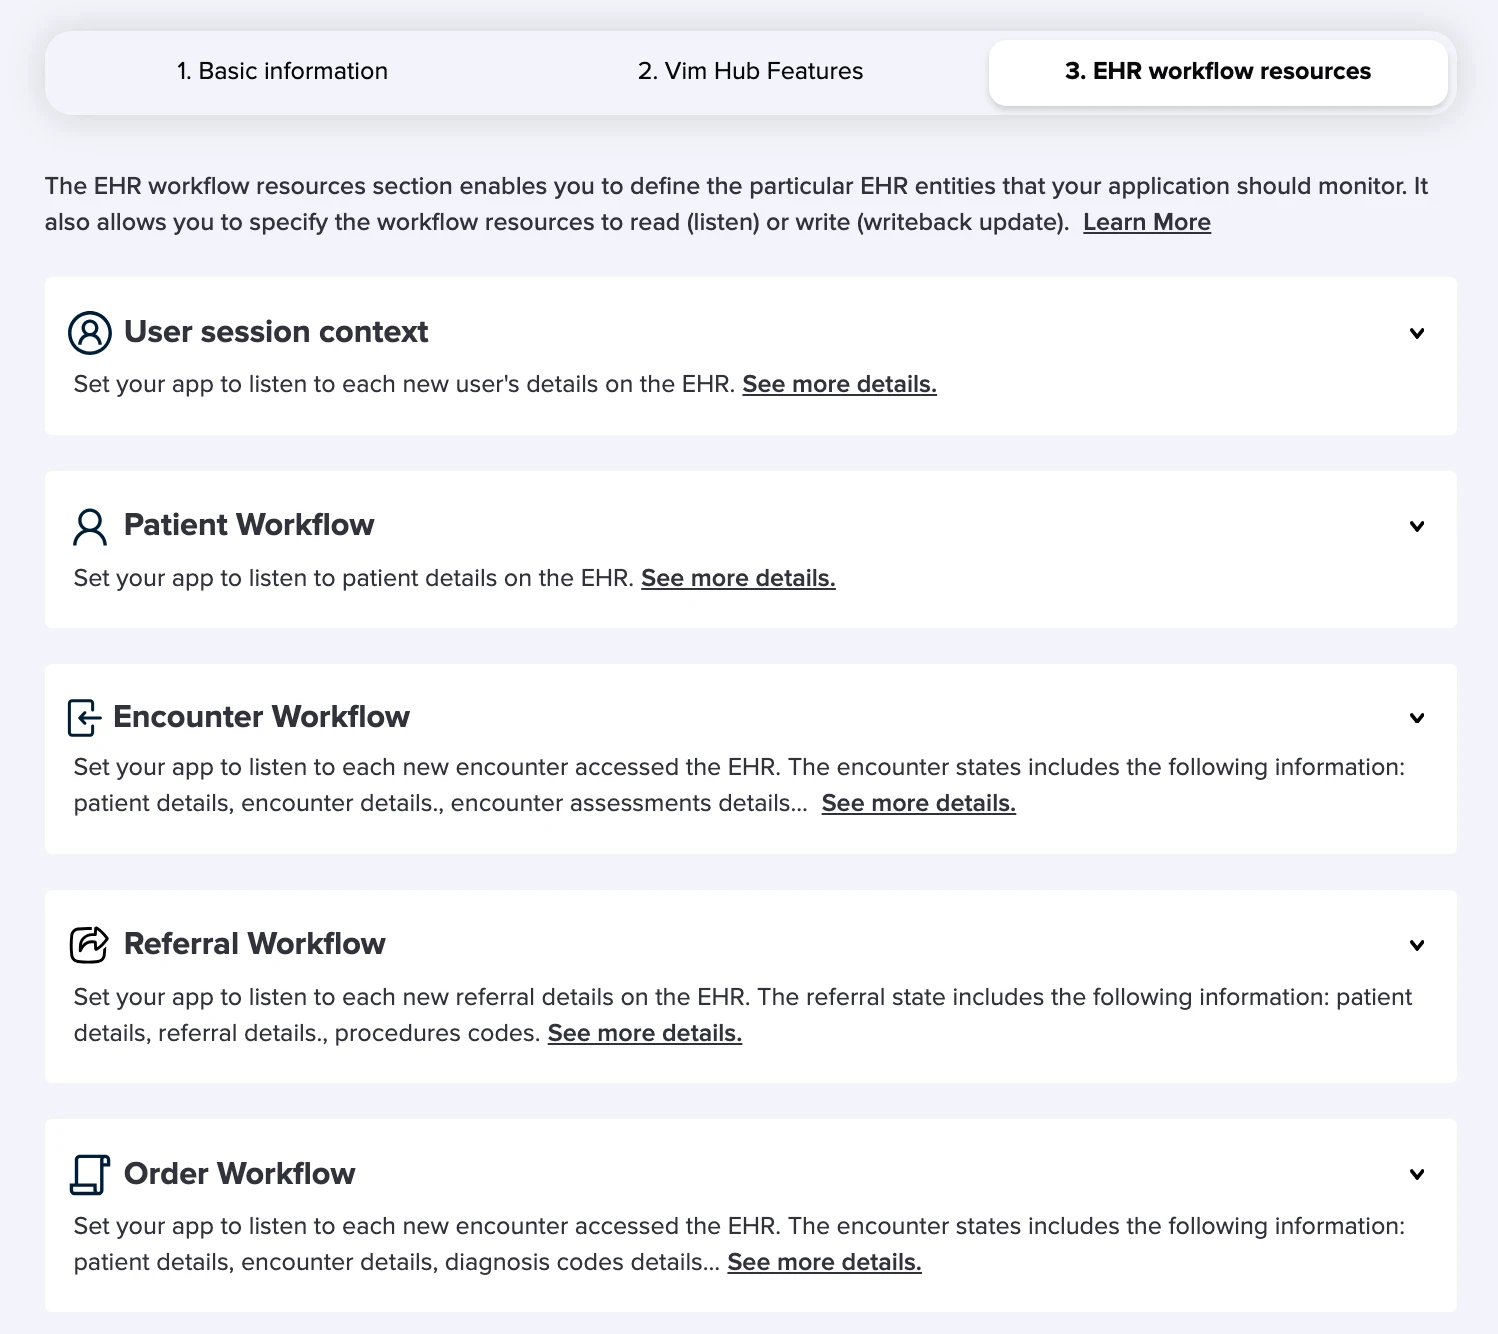
In the EHR Workflow Resources tab, you can select which specific sub-entities your application needs to read from or write to within the EHR using the SDK. This section is divided into five main entity categories, with each offering the option to select individual sub-entities based on your application's requirements.
This setup acts as a manifest for your app, allowing you to request the necessary permissions and scopes for interacting with the EHR data through the SDK. It's important to select only the entities your app will actually use, ensuring a streamlined and secure integration.
For a full list of available sub entities to read and write to the EHR please read the below:
- User read scopes
- Patient read scopes
- Encounter read scopes and write scopes
- Referral read scopes and write scopes
- Orders read scopes
4. API
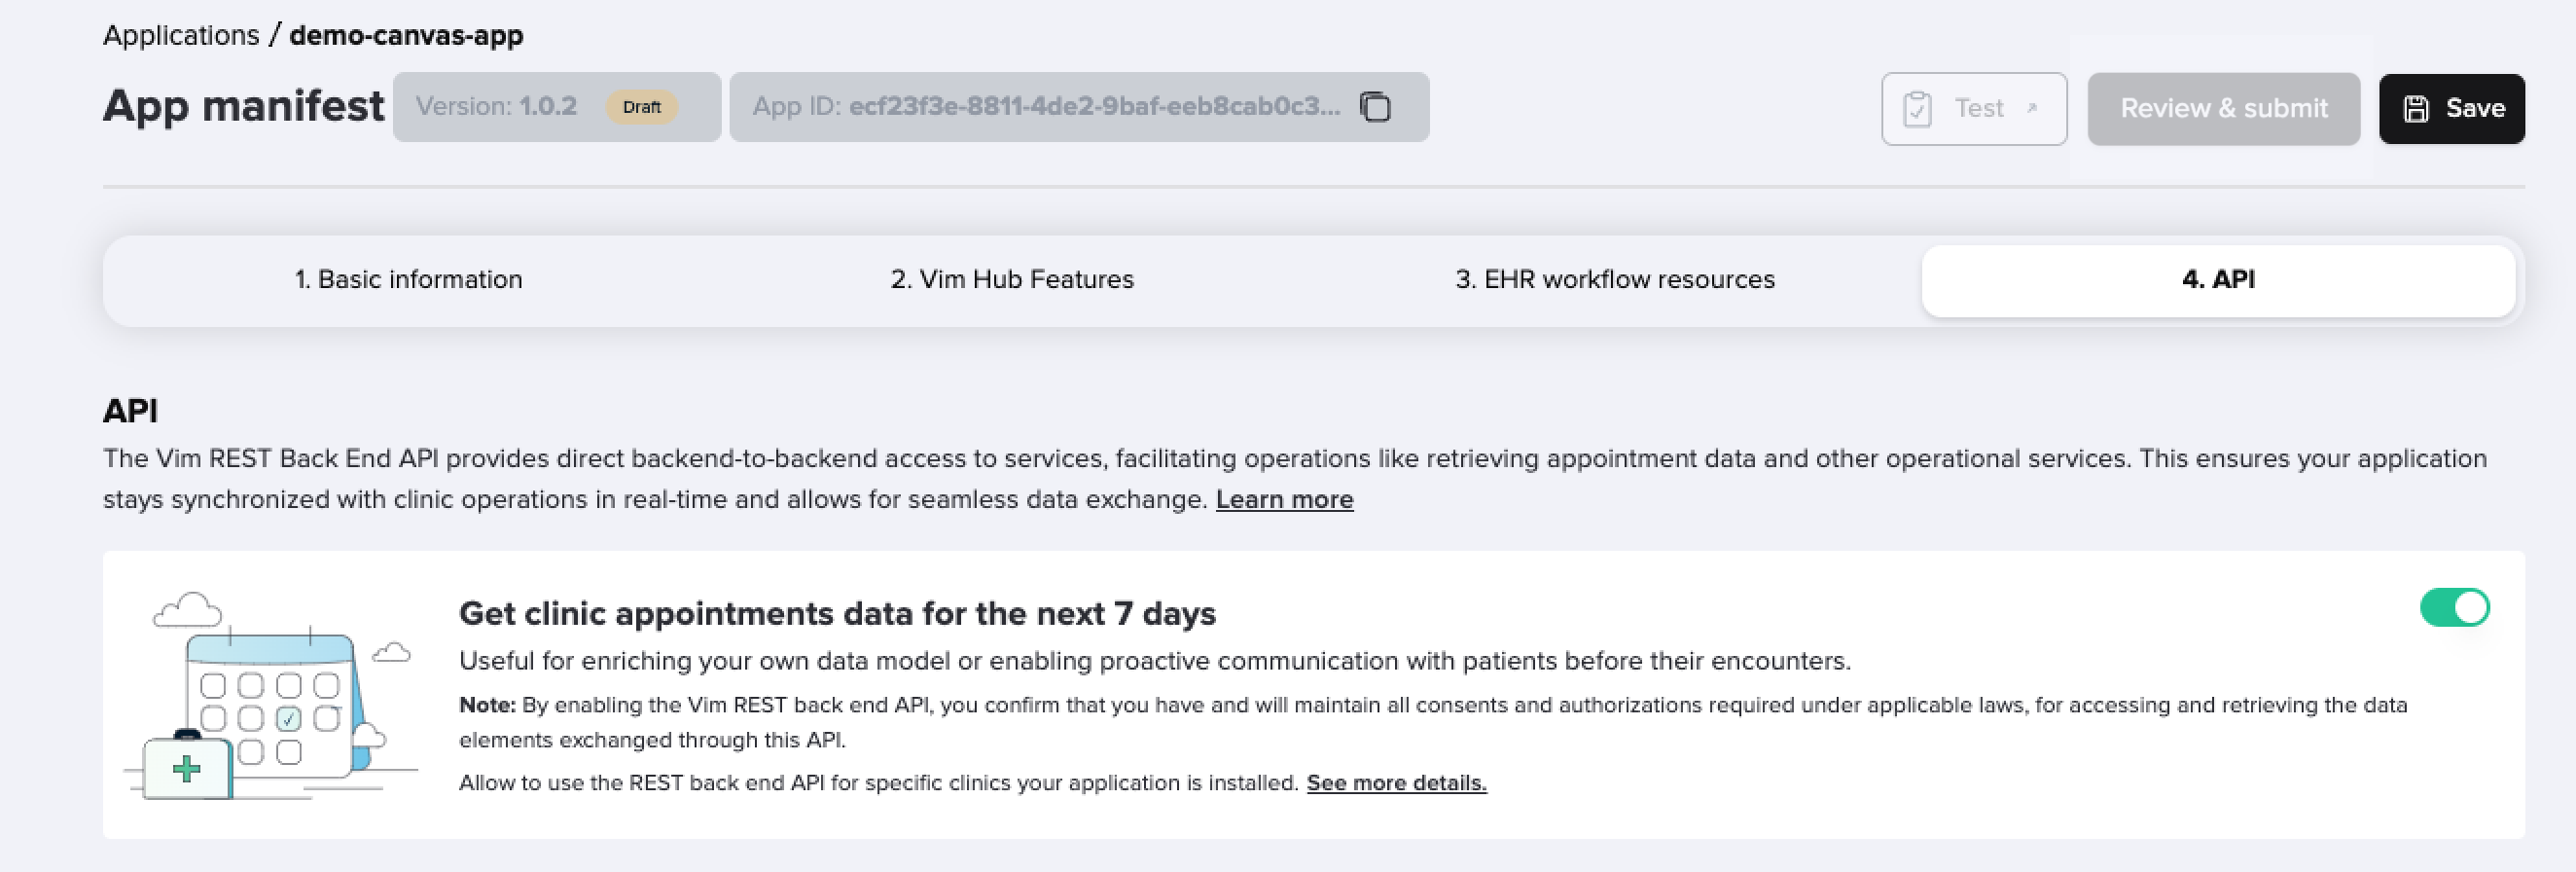
In the API tab, you can enable the Appointments public API by turning on the toggle. This API enables Vim Canvas™️ app developers to fetch future appointments for specific clinic NPIs through backend API requests. The endpoint returns scheduled appointments for the next 7 days across all providers in the clinic.
