Appearance
Introduction
The application authentication process is designed to secure both parties(Vim and application) by safeguarding access to resources and preventing unauthorized injections. This process focuses on three key objectives:
- Secured access to EHR resources:
Ensure that access to Electronic Health Records (EHR) resources exposed by Vim is secure and compliant with industry standards.
- Third-Party authentication via SSO:
Enhance user experience by enabling Single Sign-On (SSO) with Vim acting as the Identity Provider (IDP), facilitating seamless third-party authentication.
- Delegate SDK authorization to the application:
Empower the application to determine whether the user is authorized to utilize the VimOS SDK and to halt SDK initialization if they are not. This enables the app to seamlessly onboard and offboard users without requiring extra integration.
OAuth 2.0 in Vim
Vim OS Apps initialization process is based upon OAuth 2.0, an authorization framework protocol that allows a third-party website or application access to the user's protected resources.
An OAuth 2.0 flow has the following roles:
- Resource owner: Entity that can grant access to a protected resource. In this case, the clinic.
- Resource server: Server hosting the protected resources. This is the API you want to access. In this case, Vim OS.
- Client: Application requesting access to a protected resource. This is your App.
- Authorization server: Server that authenticates the Resource Owner and issues access tokens after proper authorization. In this case, Vim.
OpenId Connect
VimOs implements OpenID Connect (OIDC) on top of OAuth2 to enable seamless Single Sign-On (SSO) with third-party applications.
OpenID Connect (OIDC) is an identity layer on top of the OAuth 2.0 protocol, which allows clients to verify the identity of the end-user based on the authentication performed by an authorization server, as well as to obtain basic profile information about the end-user in an interoperable and REST-like manner. Essentially, it provides the third-party app with Single Sign-On (SSO).
Key Features
ID Token: A JWT (JSON Web Token) that contains user identity information, issued by the authorization server.
UserInfo Endpoint: An endpoint that returns additional claims about the authenticated user.
OAuth 2.0 endpoints
OAuth 2.0 consists three main endpoints:
Authorization endpoint
http
GET https://api.getvim.com/v1/oauth/authorize?launch_id={{vimLaunchId}}&client_id={{yourClientId}}&redirect_uri={{yourAppUrl}}&response_type=codeThe endpoint is used to interact with the resource owner and get authorization to access the protected resource.
- Request parameters
| Parameter | Description |
|---|---|
| client_id | Client ID connected to your account. |
| redirect_uri | A successful response from the Authorization endpoint results in a redirect to this URL. The URL must match the base URL from your application manifest. |
| launch_id | Vim OS Application launch_id. This is provided automatically by the VimOS |
| response_type | Only code is supported. |
- Redirect response
http
HTTP/1.1 302 Found
Location: {yourAppUrl}?code=AUTHORIZATION_CODE
Important!
TIP
Local development in Chrome
When running your app locally (http://localhost), you may see CORS errors, a blank iframe, or an authentication flow that doesn’t start.
This is not a Vim issue.
Recent versions of Chrome (v142+) block loading localhost inside iframes by default. Since Vim apps run in an iframe, this can prevent local apps from loading during development.
Local dev workaround:
Disable the Chrome flag chrome://flags/#local-network-access-check and relaunch the browser. More details: https://chromestatus.com/feature/5152728072060928
The endpoint will issue an authorization code and will pass it as part of the query params to the redirect_uri. This code will later be exchanged for access token & id tokens using the token endpoint.
| Parameter | Description |
|---|---|
| code | A one-time use query parameter used for secure authorization in the authentication flow. |
Token endpoint
http
POST https://api.getvim.com/v1/oauth/token
Content-Type: application/json
The application uses the endpoint to obtain an access token and id token. The application provides the authorization code received from the authorization endpoint in exchange for the tokens.
- Request body
| Field | Description |
|---|---|
| grant_type | Only authorization_code is supported. |
| client_id | Client ID connected to your account. |
| client_secret | Secret connected to your account. |
| code | The authorization code from the authorization endpoint. |
- Response payload
| field | Description |
|---|---|
| access_token | JWT token to be presented to vim when calling SDK to fetch EHR resource. |
| id_token | JWT token with the authenticated user information. Follows standard OIDC format. and is issued exclusively to the application. |
Id token example:
json
{
  "iss": "https://auth.getvim.com",
  "sub": "auth0|550e8400-e29b-41d4-a716-446655440000",
  "aud": "{{yourClientId}}",
  "exp": 1311281970,
  "iat": 1311280970,
  "given_name": "Jane",
  "family_name": "Doe",
  "email": "[email protected]",
  "is_free-trial": true,
  "days_until_end_of_trial": 3,
  "application_billing_plan":, "free_trial"
}
Checking User Free Trial Status
If your app uses a free trial billing plan, the Id token includes fields that indicate whether the user is currently in a 30‑day trial and how many days remain.
- Trial Fields
| Field | Type | Description |
|---|---|---|
| is_free_trial | boolean | true if the user is within their 30-day trial. false once the trial ends or for non-trial plans. |
| days_until_end_of_trial | number / null | Days remaining in the free trial. null if the trial hasn't started or non-trial plans. |
Example Usage
json
{
  "is_free_trial": true,
  "days_until_end_of_trial": 12
}- User has 12 days left in the trial.
- Allow full app access and prompt to upgrade.
json
{
  "is_free_trial": false,
  "days_until_end_of_trial": 0
}
Trial ended.
Check your own DB to confirm if the user upgraded.
- If not upgraded, return HTTP 403 (unauthorized) to avoid billing.
- If upgraded, keep returning user as authorized.
- If you continue returning the user as authorized and set the activation status to
Enabledafter the 30-day free trial period available from the idToken, Vim will charge you for that user even if user has not converted to a paid plan on your own database.
json
{
  "is_free_trial": false,
  "days_until_end_of_trial": null
}- User not a free trial plan.
json
{
  "is_free_trial": true,
  "days_until_end_of_trial": null
}- User has a free trial plan, but the trial hasn't started. This happens after initial app installation and before the first activation. The 30-day trial countdown begins only when the application is first activated.
- Allow full app access and prompt to upgrade.
Authorized Users and Billing Post Free Trial Period
Vim bills only for users you return as authorized with your app activation status changed to Enabled. If you continue returning the user as authorized and set the activation status to Enabled after the 30-day free trial period available from the idToken, Vim will charge you for that user even if user has not converted to a paid plan on your own database.
Best Practices
- Check these fields during user authentication.
- Sync with your internal billing or CRM to confirm conversion.
- Deauthorize users whose trials have expired to avoid unwanted billing.
UserInfo endpoint
http
GET https://api.getvim.com/v1/oauth/userinfo
Authorization: '{ACCESS_TOKEN}'
An application can use the endpoint to fetch additional info on the authenticated user. The application provides the access token it received from the token endpoint as authorization header and will receive payload with the user details.
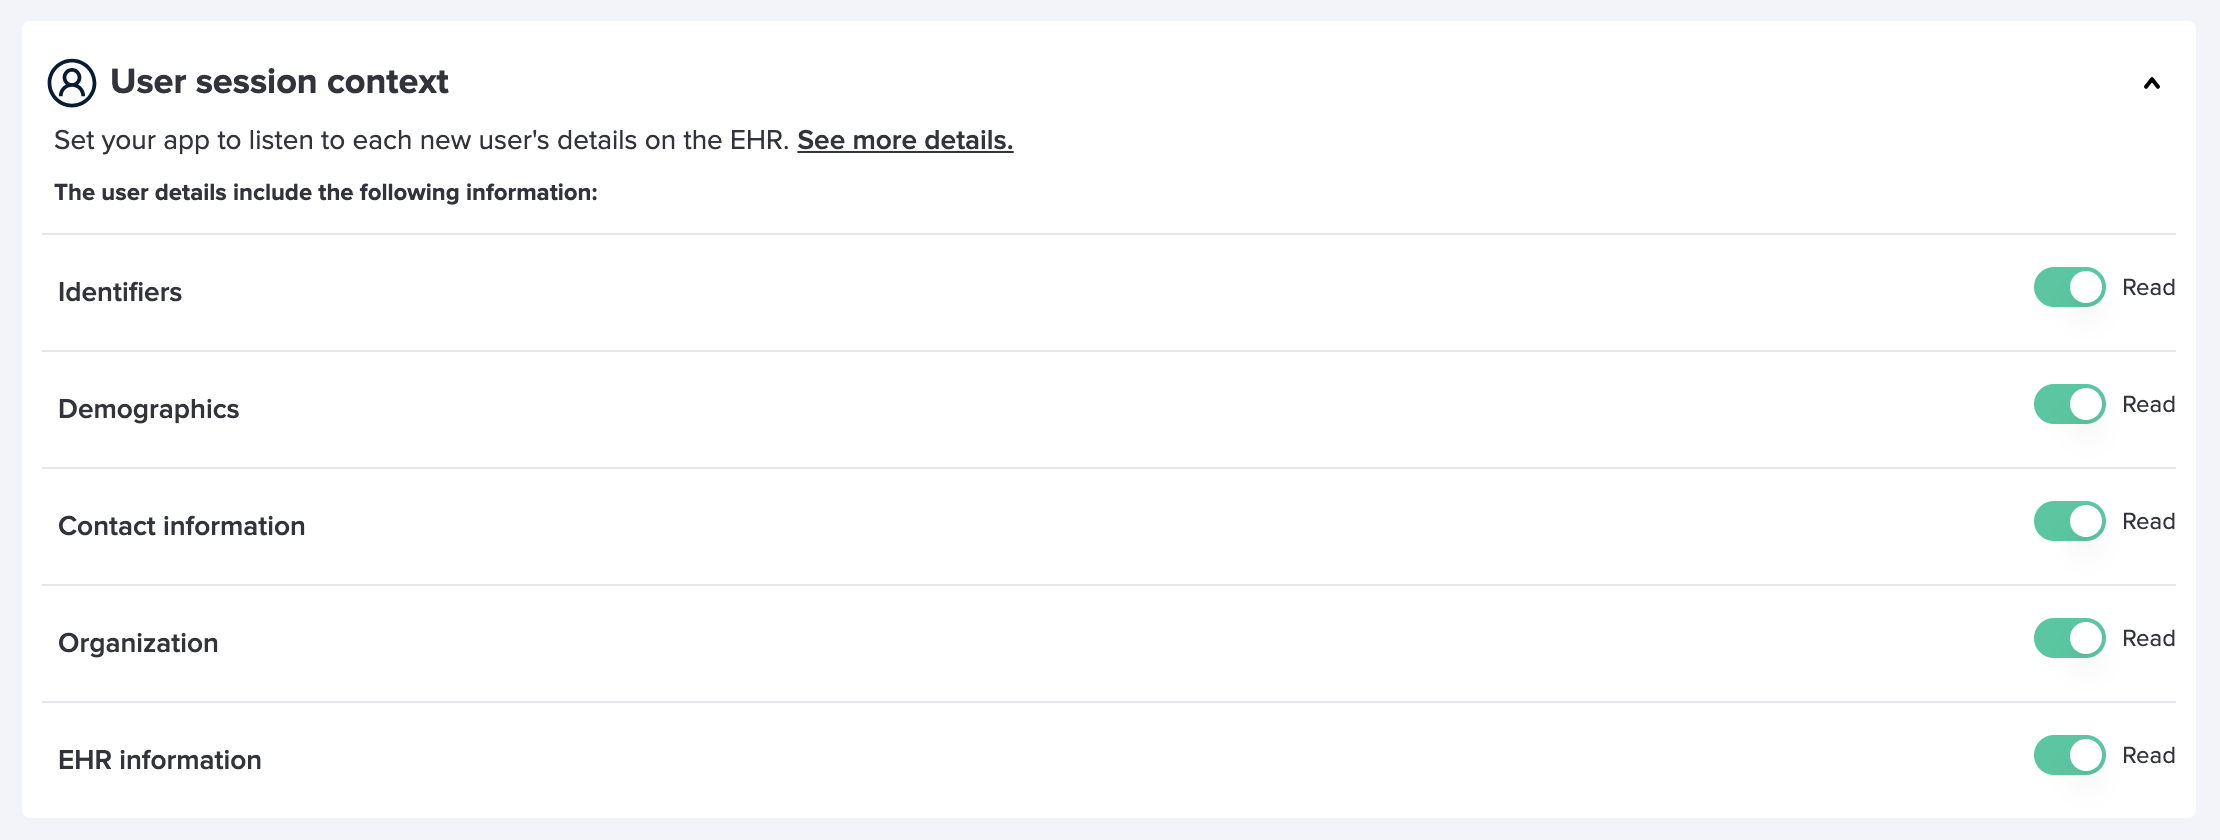
WARNING
Your application will only receive data for fields with explicitly declared read access in the Developer Console. Fields of the user entity without declared read access will consistently return undefined. Permissions for fields are grouped into dedicated subsections, allowing you to grant or revoke access to related groups of fields as needed.
- Request headers
| Header | Description |
|---|---|
| Authorization | The standard header populated with access token received from Vim. |
- Response payload
| Field | Description |
|---|---|
| Authenticated user email, unique identifier in Vim, can be used by the app for identification. | |
| sub | Unique identifier of the authenticated user in Vim, can be used by the app for identification. |
| family_name | Authenticated user last name, Optional. |
| given_name | Authenticated user first name, Optional. |
| https://getvim.com/ehrUsername | EHR username. |
| https://getvim.com/organization | Vim organization. Represents the clinic entity. A JSON object with the following fields: id(Vim identifier) and name. |
Response example:
json
{
    "email": "[email protected]",
    "sub": "auth0|550e8400-e29b-41d4-a716-446655440000",
    "family_name": "Doe",
    "given_name": "Jane",
    "https://getvim.com/ehrUsername": "janedoe",
    "https://getvim.com/organization": {
        "id": "12345",
        "name": "Jane Doe Organization"
    }
}
The initialization sequence explained
- Pre condition: the user authenticates to Vim and Vim OS loads.
- Launch endpoint: When Vim OS starts the app loading process it first calls the app launch endpoint URL, provided in the Developer Console. With the correct request parameters in place, the launch endpoint must redirect to Vim's authorization endpoint.
- Authorization Server: Vim’s authorize endpoint will issue an authorization code and redirect to the provided verified
redirect_uri, which should be the App’s main page, with the authorization code as a query param in the url. - App initialization: Your App code is loaded and should initialize a
VimOSinstance. See examples below.- The SDK uses the authorization code from the URL query param and calls your app backend token endpoint (a URL provided in the initialize method) with the authorization code.
- Your App backend should call the Vim OS token endpoint with the authorization code & the app's secret and client ID.
- The Vim OS token endpoint returns an access token and an id token to your app backend.
- Your app backend identifies and authorizes the user based on the id token and/or userProfile endpoints.
- The app backend returns both the access token and id token to the SDK.
- Secure communication: After Vim OS verifies the access token, a secure communication channel is established and maintained between VimOS and the Application.
- Optional step - application SSO: Utilize generated id token to authenticate the user on application end.
- The SDK then resolves the init process with the application id token which was generated exclusively to it.
- The application can now use the id token to generate its own access token for use when calling its internal APIs.
Managing Token Expiration
TIP
Vim OS does not support Refresh tokens.
Access tokens are meant for initial session establishment only and can't be refreshed.
The recommended pattern: Exchange the Vim ID token for your own application's tokens, then manage your own session lifecycle independently.
javascript
// After SDK initialization, exchange tokens with your backend
const vimOs = await loadSdk();
const { idToken } = await vimOs.sessionContext.getIdToken();

// Exchange for your app's tokens
const response = await fetch('/api/auth/exchange', {
  method: 'POST',
  headers: {
    'Content-Type': 'application/json',
    'Authorization': `Bearer ${idToken}`
  }
});

const { accessToken, refreshToken } = await response.json();

// Your app now manages its own session with refresh tokens
localStorage.setItem('appAccessToken', accessToken);
localStorage.setItem('appRefreshToken', refreshToken);
Why this approach?
- Separation of concerns: Vim handles EHR authentication, you handle session management
- Flexibility: Implement custom refresh logic, token storage, and session policies
- Independence: Your session doesn't depend on Vim token expiration
What NOT to do:
❌ Don't try to refresh Vim tokens - they don't support refresh grants
❌ Don't store Vim access tokens for long-term use - they expire quickly
❌ Don't implement polling/refresh loops for Vim tokens
Step by step implementation
You will need to have a running app backend server, and pass the correct parameters when initializing the VimOS SDK.
Important!
TIP
To test your application, first integrate the SDK into your codebase. Next, implement the application authentication flow. Develop and test this flow in the Vim Sandbox EHR, as communication between Vim and your application requires your application to run in the Vim Hub on an EHR. When Vim injects your application iframe in the Sandbox EHR, VimOS automatically sends a request to your launch token url defined in the manifest with the launch_id.
App backend server
Your server will need to handle 2 incoming requests:
1. The launch endpoint
Important!
TIP
Local development in Chrome
When running your app locally (http://localhost), you may see CORS errors, a blank iframe, or an authentication flow that doesn’t start.
This is not a Vim issue.
Recent versions of Chrome (v142+) block loading localhost inside iframes by default. Since Vim apps run in an iframe, this can prevent local apps from loading during development.
Local dev workaround:
Disable the Chrome flag chrome://flags/#local-network-access-check and relaunch the browser. More details: https://chromestatus.com/feature/5152728072060928
The launch endpoint will be called by VimOS frontend in order to issue an authorization code via Vim’s authorize endpoint.
Your launch endpoint url will:
- Receive an incoming
GETrequest with alaunch_idandvim_organization_idas a query parameters. - Redirect the call to
https://api.getvim.com/v1/oauth/authorizewith 4 query parameters described above:launch_id,client_id,redirect_uriandresponse_type. vim_organization_id- A unique identifier for the clinic in Vim where the app is rendered. The launch endpoint can use this parameter to perform logic when constructing the finalredirect_uri(optional step for multi-tenant apps).ehr_url- Returns the host EHR url which can be used to handle EHR Whitelist / Blacklist - if needed to prevent / limit to only running the app in specific EHRs.
2. The app token endpoint
The app token endpoint will be called by the VimOS SDK in order to exchange the authorization code with an access token via Vim’s authorize endpoint. it is responsible also for adding additional layer of application authorization.
Your app token endpoint will:
- Receive an incoming
POSTrequest with thecodein the JSON body. - Send a
POSTrequest tohttps://api.getvim.com/v1/oauth/tokenwith thecode,client_id,client_secretandgrant_typein the request JSON body. - Receive a JSON response with the access token and id token.
- Authorize user: verify id token and check the user identity against the application database to confirm their authorization status. See id token verification section for more details.
- Respond appropriately:
- If the user is successfully authorized, return the token endpoint JSON response to the incoming request.
- If the user is not authorized, return a 403 Forbidden status code.
CORS support
TIP
Since the Vim-OS SDK operates from a different domain than your application, it is essential to configure your backend to support Cross-Origin Resource Sharing (CORS) for the getvim.com domain.
To ensure smooth operation and avoid potential issues with token handling and launch requests, we recommend using standard CORS libraries. These libraries provide a reliable solution for managing cross-origin requests and help prevent common problems associated with CORS. Otherwise, you may face issues such as incorrect handling of preflight OPTIONS requests.
Example:
js
import express from 'express';
import fetch from 'node-fetch';
import cors from 'cors';
import jwt_decode from 'jwt-decode';

const app = express();

// Allow incoming requests from the Vim SDK
app.use(
  cors({
    origin: [/\.getvim\.com$/],
  }),
);

// It's recommended to store your account's client id and secret in environment variables
// You can find the values in your Vim account page: https://console.getvim.com/organization-admin/my-account
const clientId = process.env.CLIENT_ID;
const secret = process.env.CLIENT_SECRET;

// Replace with the actual base URL from your application manifest
const redirectUri = 'https://application-domain.com/main-app';

app.use(express.json());
app.get('/api/launch-app', (req, res) => {
  const launchId = req.query.launch_id;

  // Build the authorization URL to redirect to
  const authorizationUrl = new URL('https://api.getvim.com/v1/oauth/authorize');
  authorizationUrl.searchParams.set('launch_id', launchId);
  authorizationUrl.searchParams.set('client_id', clientId);
  authorizationUrl.searchParams.set('redirect_uri', redirectUri);
  authorizationUrl.searchParams.set('response_type', 'code');

  // Redirect the request
  res.redirect(authorizationUrl.toString());
});

app.post('/api/generate-token', async (req, res) => {
  const { code } = req.body;

  const vimResponse = await fetch('https://api.getvim.com/v1/oauth/token', {
    method: 'POST',
    headers: { 'Content-Type': 'application/json' },
    body: JSON.stringify({ client_id: clientId, code, client_secret: secret, grant_type: 'authorization_code' }),
  });

  const tokenData = await vimResponse.json();

  // Verify and decode the ID token (use verification from earlier in the docs)
  const verifiedIdToken = await verifyToken(tokenData.id_token);

  // Check basic authorization
  if (!(await isAuthorized(verifiedIdToken))) {
    return res.status(403).send('Forbidden: You do not have access to this resource.');
  }

  // Check free trial status
  const billingPlan = verifiedIdToken['application_billing_plan'];
  const daysRemaining = verifiedIdToken['days_until_end_of_trial'];
  const isFreeTrial = verifiedIdToken['is_free_trial'];

  if (billingPlan === 'free_trial' && !isFreeTrial) {
    return res.status(403).json({
      error: 'trial_expired',
      message: 'Your free trial has ended. Please upgrade to continue using this service.'
    });
  }

  // Optional: Log analytics for trials ending soon
  if (billingPlan === 'free_trial' && daysRemaining <= 3) {
    console.log(`Trial ending soon for user ${verifiedIdToken.sub}: ${daysRemaining} days remaining`);
  }
  res.json(tokenData);
});
app.listen(3000, () => console.log('Server listening on port 3000'));

async function isAuthorized(vimResponse) {
  // Validate ID token, call userinfo endpoint if needed, and apply custom logic to check against your application's database.
  // Refer to the Id token verification section for an example.
}
Id token verification
When you need to identify a user and determine their access to your application, verifying the JWT ID token is crucial. Follow these guidelines to ensure proper verification:
Library: Utilize any third-party JWT library for token verification.
Algorithm: The JWT ID token uses the RS256 algorithm.
JWKS URI: The JSON Web Key Set (JWKS) can be retrieved from the following URI: https://auth.getvim.com/.well-known/jwks.json.
Issuer: Verify that the token’s issuer (
iss) matches the following URL:https://auth.getvim.com/.Audience: Ensure that the
aud(audience) field in the ID token matches the client ID of your application.
By adhering to these steps, you can accurately verify the JWT ID token and ensure its validity.
Example:
js
import jwt from 'jsonwebtoken';
import jwksClient from 'jwks-rsa';

const jwtClient = jwksClient({
  jwksUri: 'https://auth.getvim.com/.well-known/jwks.json',
});

const clientId = process.env.CLIENT_ID;

async function verifyToken(idToken) {
  const options = {
    audience: clientId,
    issuer: 'https://auth.getvim.com/',
    algorithms: ['RS256'],
  };

  return new Promise((resolve, reject) => {
    jwt.verify(idToken, getKey, options, (err, decoded) => {
      if (err) {
        reject(err);
        return;
      }
      resolve(decoded);
    });
  });
}

function getKey(header, callback) {
  jwtClient.getSigningKey(header.kid, function (err, key) {
    var signingKey = key.publicKey || key.rsaPublicKey;
    callback(null, signingKey);
  });
}
Initializing the VimOS SDK from your app
ts
const vimOS = await window.vimSdk.initializeVimSDK();
// Use VimOS instance for further interactions with VimOS.js
ts
import { loadSdk } from 'vim-os-js-browser';

async function init() {
  const vimOS = await loadSdk();
  // Use vimOS instance for further interactions with VimOS.js
}
init();
tip
TIP
Once the SDK initialization and authentication process is complete, your application's default activation status is Disabled. This means it will appear grayed out on the Vim Hub, without an option for users to click and open the iframe. If you wish to make your application accessible, you must proactively change the activation status to Enabled.
However, we advise enabling your application only when there is tangible value for end-users to access it, to prevent user fatigue from encountering your app without immediate action or value. You can dynamically control the activation status following these instructions.
Optional - application SSO
To enable Single Sign-On (SSO) in your application, follow these steps:
Initialize the SDK: Start by initializing the SDK with initializeVimSDK(). This method sets up the SDK and provides you with a vimOs object.
Retrieve the ID Token: Once the SDK is initialized, use the vimOs.sessionContext.getIdToken() method to obtain the OIDC ID token JWT. This token is generated specifically for your application and serves as proof of authentication.
Generate Internal Access Token: With the ID token in hand, your application can create its own internal access token. The method for generating this internal access token is entirely up to your application’s authentication implementation. The vim-os SDK does not influence or control how this access token is created or managed. This internal access token is used for managing user sessions and securely accessing resources within your application.
By leveraging this SSO flow, your application can provide a smoother and more seamless user experience, reducing the need for repeated logins and improving overall access management.
Example:
ts
const vimOs = await window.vimSdk.initializeVimSDK();

const { idToken } = await vimOs.sessionContext.getIdToken();

const yourOwnAccessToken = await exchangeIdTokenForAccessToken(idToken);

// Use access token to call your own backend...


async function exchangeIdTokenForAccessToken(idToken) {
  const response = await fetch('https://your-auth-server.com/login', {
    method: 'POST',
    headers: {
      'Content-Type': 'application/json',
    },
    body: JSON.stringify({ idToken }),
  });

  const data = await response.json();
  return data.accessToken;
}
ts
import { loadSdk } from 'vim-os-js-browser';

async function init() {
  const vimOs = await loadSdk();

  const { idToken } = await vimOs.sessionContext.getIdToken();

  const yourOwnAccessToken = await exchangeIdTokenForAccessToken(idToken);

  // Use access token to call your own backend...
}

async function exchangeIdTokenForAccessToken(idToken) {
  const response = await fetch('https://your-auth-server.com/login', {
    method: 'POST',
    headers: {
      'Content-Type': 'application/json',
    },
    body: JSON.stringify({ idToken }),
  });

  const data = await response.json();
  return data.accessToken;
}

init();
Testing the authentication flow
To help you with testing the authentication flow in a local development environment.
We have created a Postman collection that you can use to test the authentication flow.
Setup
- Have an app configured in Console
- Install Postman
- Import the Postman collection
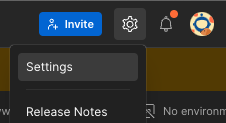
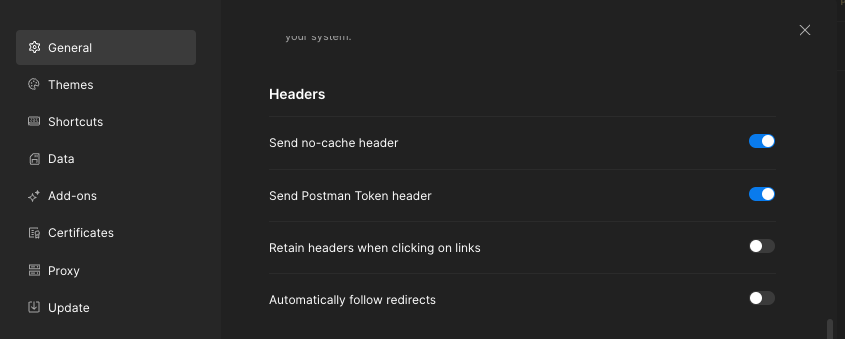
- Configure postman to not follow redirects
- Go to Settings -> General -> Headers -> Automatically follow redirects -> Turn it off
- Go to Settings -> General -> Headers -> Automatically follow redirects -> Turn it off
Steps to test the authentication flow
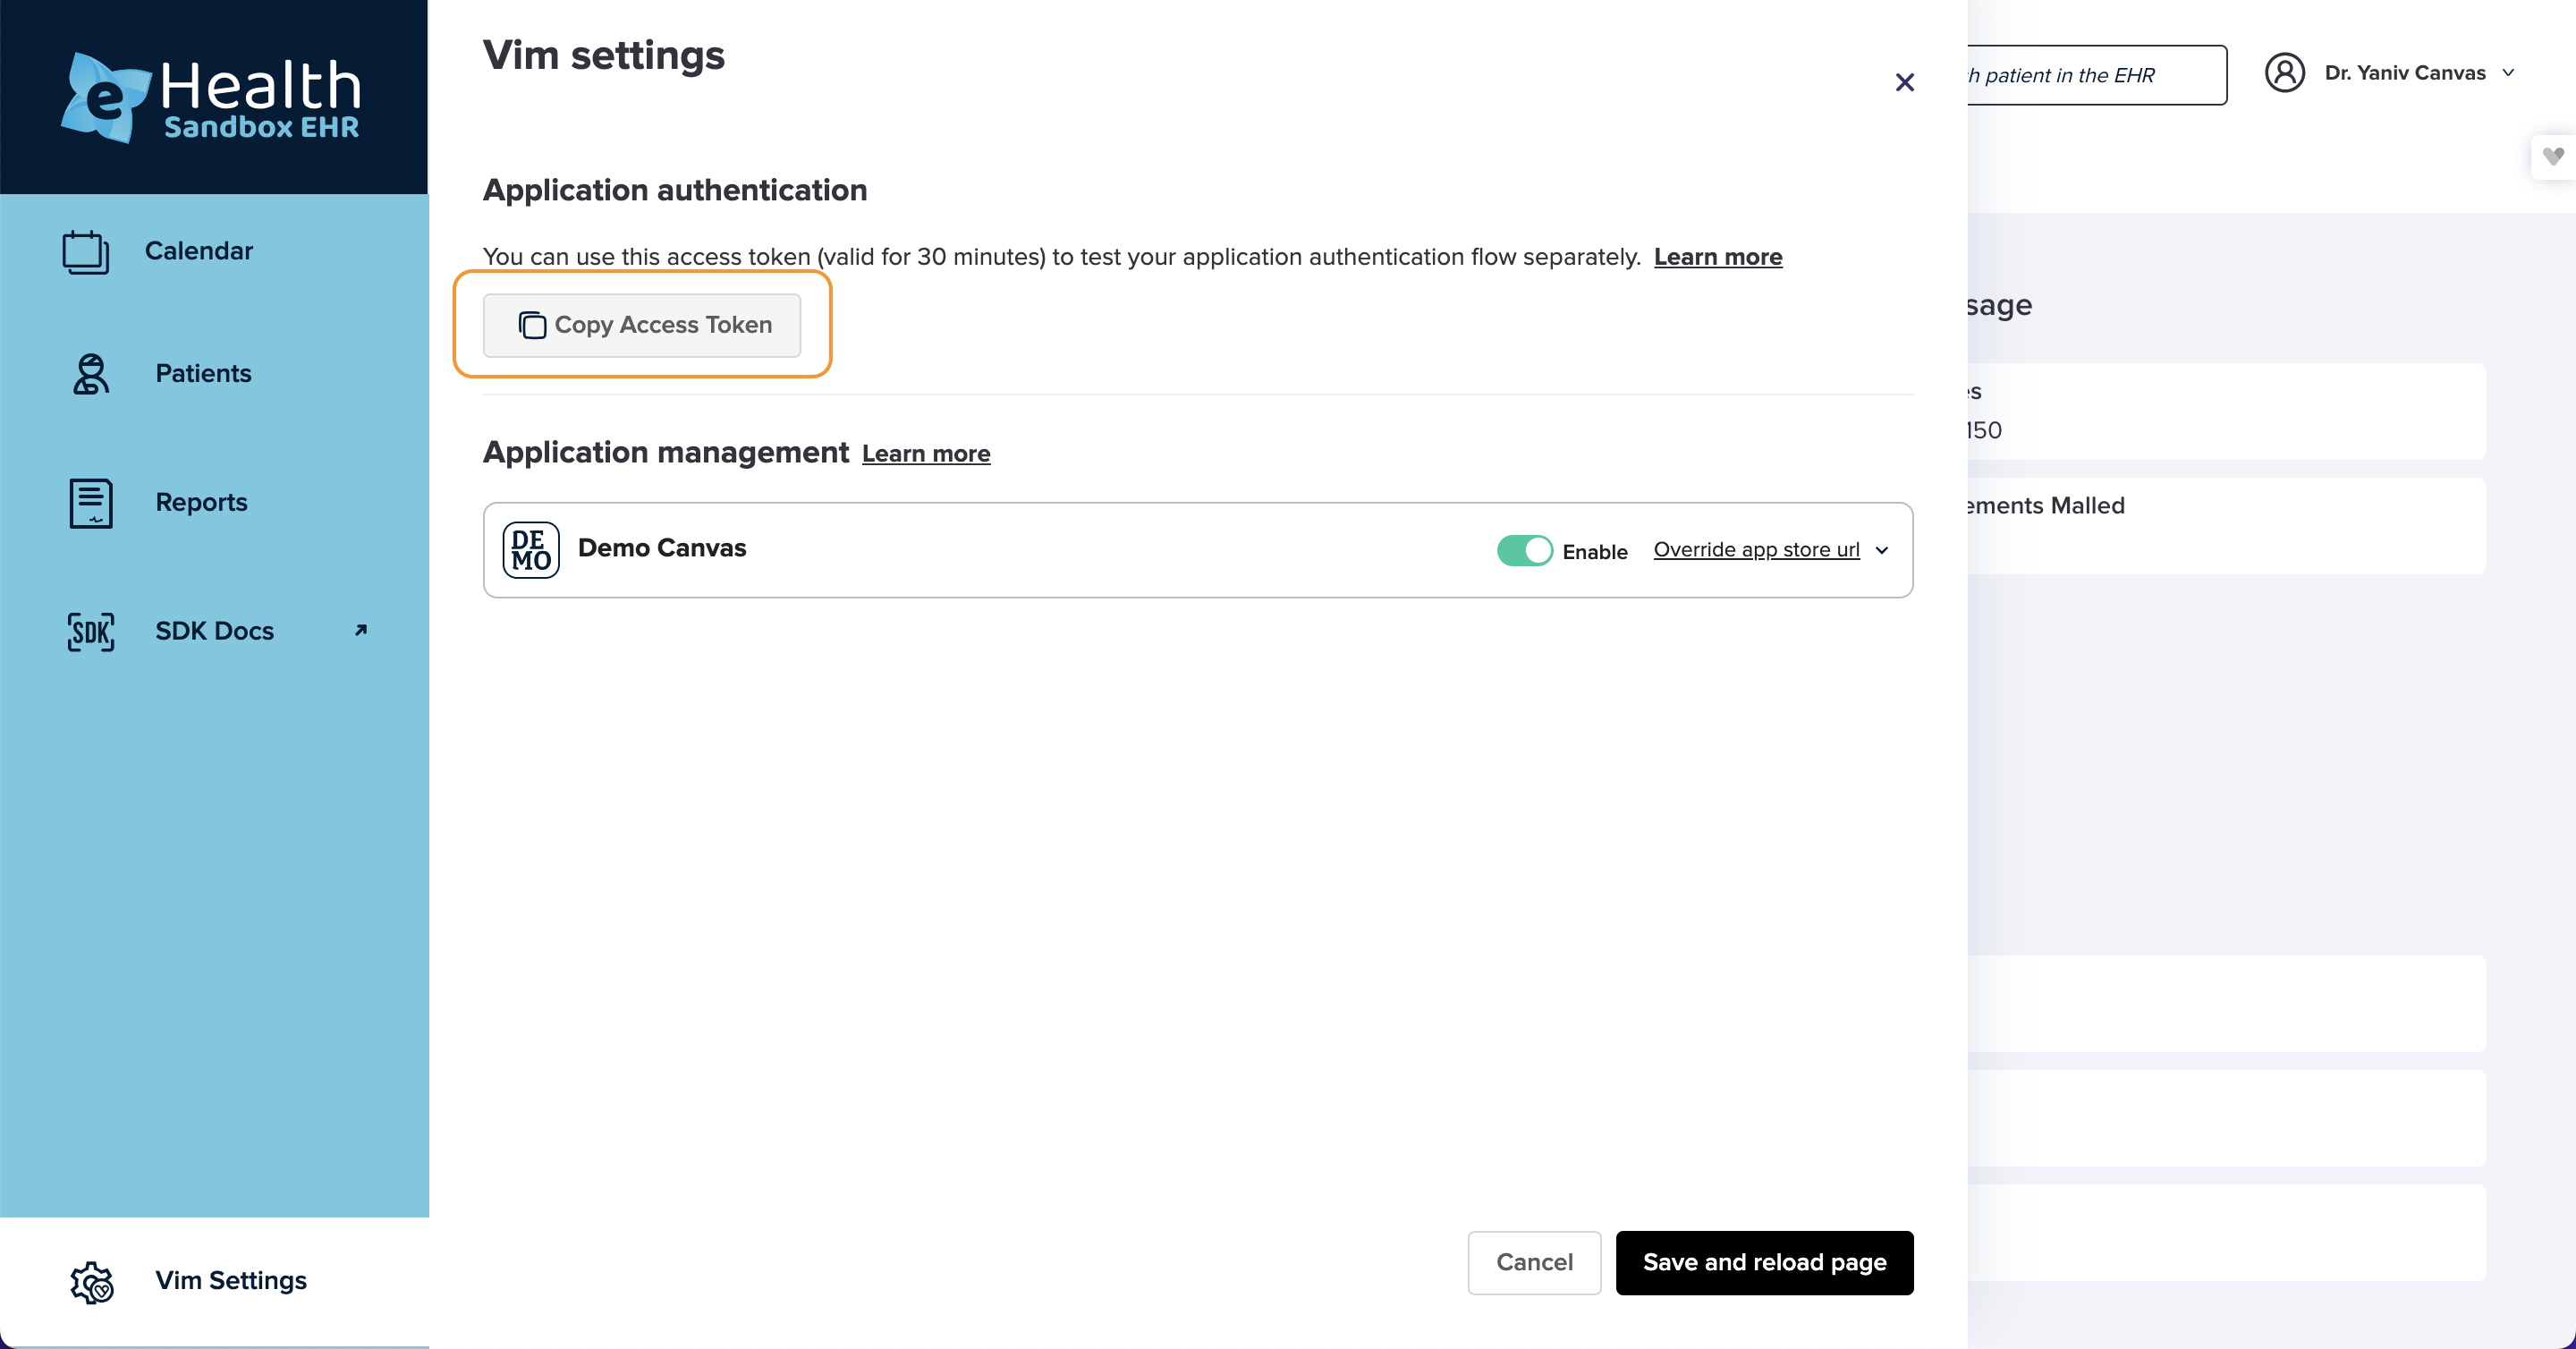
- Extract the access token from the sandbox EHR
- Open the sandbox EHR
- Go to the Vim Settings page
- Copy the access token
- Set up the environment variables in Postman
authToken: The access token from the vim settings page in the sandbox EHR- Note: The access token is only valid for 30 minutes; If you start receiving an
Authentication failedresponse from theCreate App Launch IDrequest, reload the sandbox EHR and extract a new token
- Note: The access token is only valid for 30 minutes; If you start receiving an
appId: Your app IDappVersion: Your app versionclientId: The client ID from your account pageclientSecret: The client Secret from your account pagelaunchEndpoint: Your backend launch endpointappTokenEndpoint: Your backend token endpoint
Be sure to save (ctrl+s) your changes to the variables; Postman doesn't auto save them.
You are not required to set the other variables, they will be auto populated by the collection logic.

- Start running the API calls in the collection.
When you run each request, some verifications are ran afterwards to verify the response is correct.
The collection also stores results in variables that are being used by the following API calls, so you should run them in the following order.Create App Launch ID- Calls Vim backend to generate the launch ID and store it as a collection variableLaunch- Calls your backend launch endpoint with the launch ID, The collection will verify the response and store the authorization code as a collection variableVim OS Authorize Endpoint- Calls Vim backend to verify the authorization request, The response should be a redirect request to your application with the authorization code as a query parameter.App Token Endpoint- Calls your backend token endpoint with the authorization code, The response should contain access token and id token.UserInfo Endpoint- Calls Vim backend with the access token, The response should contain the authenticated user information.
In case of errors, the collection will provide you with detailed error messages.
Auth0 social login
note
TIP
Auth0 social login flow comes instead of implementing the OAuth 2.0 endpoints /oauth/authorize and /oauth/token endpoints. It's relevant if you are working with Auth0 as your IDP
This guide explains how to integrate Auth0’s social login with Vim's OAuth 2.0 authorization flow in a React application.
Step 1: configure Auth0 social connection
Log in to your Auth0 dashboard and navigate to Connections > Social. Set up the Vim connection by enabling it and filling in the required credentials.
- Copy and paste your Client ID and Client Secret from the Vim Developer Console.
- For the Token URL and Authorize URL, use the following:
- Authorize URL:
https://api.getvim.com/v1/oauth/authorize - Token URL:
https://api.getvim.com/v1/oauth/token
- Authorize URL:
Fetching user profile from Vim:
After authenticating, you will need to fetch additional user details from Vim and map them to a user profile in your Auth0 tenant. To retrieve the user's profile from Vim, complete the "Fetch User Profile Script" as follows:
js
function(accessToken, ctx, cb) {
  const options = {
    url: 'https://api.getvim.com/v1/oauth/userinfo',
    headers: {
      'Authorization': accessToken
    }
  };

  request.get(options, function(error, response, body) {
    if (error) {
      return cb(error);
    }

    if (response.statusCode !== 200) {
      return cb(new Error(`Failed to fetch user profile: ${response.statusCode}`));
    }

    const json = JSON.parse(body);

    const profile = {
      user_id: json.sub,
      email: json.email,
      vimAccessToken: accessToken
    };

    cb(null, profile);
  });
}
This script sends a request to Vim's /userinfo endpoint to retrieve the user’s profile, which includes their email and user ID.
Ensure the Allowed Callback URLs in Auth0 include your application's callback URL:
http://yourappurl.comMap launch_id to login_hint:
To pass the launch_id parameter to the Vim authorize endpoint, configure your connection via the Auth0 Management API to map this parameter to login_hint. This allows the launch_id to be forwarded correctly.
For more details on how to implement this mapping, refer to the official Auth0 documentation on passing parameters to identity providers: https://auth0.com/docs/authenticate/identity-providers/pass-parameters-to-idps.
- Follow the official Auth0 documentation on social connections for partners for additional setup details.
Step 2: implementing social login in React
To initiate social login using Vim in your React app, use auth0.loginWithRedirect() as shown below:
Frontend: initiating login
js
const currentUrl = window.location.href;
const url = new URL(currentUrl);
const params = new URLSearchParams(url.search);
const launch_id = params.get('launch_id');

auth0.loginWithRedirect({
  authorizationParams: {
    login_hint: launch_id,  // Launch_id query param passed by Vim to the launch endpoint
    connection: 'Vim',  // Specifies Vim as the social provider
    audience: '<yourappaudeince>',  // Your app audience
    redirect_uri: 'http://yourappurl.com',  // Callback URL post-login
  },
});login_hint: Parameter filled with launch_id forwarded to Vim’s authorization endpoint.connection=Vim: Selects Vim as the identity provider for the social login.redirect_uri: Ensure this matches the URL configured in the Auth0 dashboard.
Step 3: Fetching and using Vim access token via Auth0 management API
After successful authentication, Auth0 stores Vim's access token under the user's profile. This token is essential for initializing the Vim SDK.
Backend: fetching the access token
To retrieve the access token for Vim from the Auth0 Management API, follow these steps:
- Make an API request from your backend to fetch the user's profile, which contains the Vim-specific access token:
http
GET https://<yourauth0tenant>/api/v2/users/<user-id>
Authorization: '{MANAGEMENT_ACCESS_TOKEN}'
Example response:
json
{
  "created_at": "2024-09-19T05:52:40.987Z",
  "email": "<user_email>",
  "identities": [
    {
      "provider": "oauth2",
      "access_token": "Vim access token",
      "connection": "Vim",
      "isSocial": true
    }
  ]
}
Extract the
access_tokenfrom the response and send it to the frontend via your backend as a proxy.Secure the token exchange flow:
We recommend taking action to ensure that the exchange request is authorized:
- Use a code exchange flow for requesting the access token.
- Ensure the request is called with a valid Authorization header.
- Limit the exchange to a specific time window to enhance security.
- Make sure the exchange is executed only once per access token.
Frontend: initializing the Vim SDK
Once you have the access token in the frontend, you can initialize the Vim SDK. This token is required for the SDK initialization to make authenticated requests to Vim's API:
javascript
// Replace 'vimAccessToken' with the actual token received from the backend
const vimAccessToken = 'vimAccessToken';

const vimOs = await window.vimSdk.initializeVimSDK({ accessToken: vimAccessToken });
Make sure to use the accessToken obtained from your backend to successfully initialize the SDK.
Step 4: enable user consent skipping
- Navigate to the APIs page in your Auth0 dashboard and select the API you wish to configure.
- In the Settings section, locate the option labeled Allow Skipping User Consent and enable it.
Important Note: Enabling this toggle allows skipping the consent page for verifiable first-party clients. This is particularly important for implementing the social login flow when rendered within an iframe, as it is a constraint we currently face. Additionally, ensure that this setting is applied to the Audience used during the login process.
If your client is hosted on localhost, Auth0 cannot reliably determine that it is a true first-party client. This is due to the potential for malicious actors to run unauthorized clients on localhost. To skip the consent page during development, consider mapping localhost to a custom domain (e.g., app.local) in your hosts file.
Step 5: Tune your Vim manifest
Add your Auth0 tenant domain to the list of allowed URLs in your Vim manifest to let Vim know that the new redirect URI is secured.
Since the token endpoint is now directly called from your Auth0 tenant, you no longer need to configure it in your Vim manifest. Please remove any existing token endpoint configurations to streamline your setup.
Client secret rotation
When implementing Vim's authentication flow, you'll use a client Secret from your account page to pass in the Vim OS token endpoint.
For enhanced security, we recommend regularly rotating these client secrets.
Vim provides a zero-downtime client secret rotation feature through the Console UI. This guide explains how to implement and manage the rotation process using both 'current' and 'fallback' secrets.
Note:
Note:
While this rotation process is recommended for enhanced security, it remains optional. Implementation is at your discretion.
Step 1: Generate a new fallback secret
Navigate to your account page in console and click on the Rotate client secret button in the client secret row.
Select Generate random secret key and copy the generated key - you will use it in the following step.
For now close the modal without clicking on Activate now.
WARNING
Activating the new client secret now, before implementing the fallback process below, would invalidate your current client secret and disrupt any existing integrations.
Step 2: Implementing fallback logic
You need to implement logic in your backend code to handle secret rotation smoothly using the current and new (fallback) secrets. If the current secret results in a 4xx error (e.g., unauthorized access), your code should automatically retry the request using the 'fallback' secret. This ensures that if the 'current' secret is invalidated, the fallback mechanism keeps the system running without downtime.
Use the key you copied in the previous step as the FALLBACK_CLIENT_SECRET value.
js
const currentSecret = process.env.CLIENT_SECRET;
const fallbackSecret = process.env.FALLBACK_CLIENT_SECRET;

async function authenticateWithVim(code, clientId) {
  async function getToken(code: string, client_secret:string) {
     return fetch(
      "https://api.getvim.com/v1/oauth/token",
      {
        method: "POST",
        headers: { "Content-Type": "application/json" },
        body: JSON.stringify({
          client_id: context.env.CLIENT_ID,
          code,
          client_secret,
          grant_type: "authorization_code"
        }),
      }
    );
  }

  let tokenResponse = await getToken(code, currentSecret);
  if (tokenResponse.status >= 400 && tokenResponse.status < 500 && fallbackSecret) {
    tokenResponse = await getToken(code, fallbackSecret);
  }
  const tokenData = await tokenResponse.json();
}
Step 3: Activate the secret rotation
Return to your account page in console and click on the Rotate client secret button in the client secret row.
Select Set your own, paste your fallback secret and activate the new client secret.
Step 4: Promoting fallback to current
After the fallback secret has been successfully used in production and all systems are stable, you should update your configuration to promote the 'fallback' secret to the 'current' secret. This keeps the system up-to-date and prepares for the next secret rotation cycle.