Appearance
Install
We provide two ways to incorporate VimOS.js into your application: Via a script tag in your html, and via a public npm package.
Script tag
Include the VimOS.js script on each page of your application to incorporate VimOS.js into your application. It should always be loaded directly from connect.getvim.com rather than included in a bundle or hosted yourself.
html
<head>
  ...
  <script src="https://connect.getvim.com/vim-os-sdk/v0.0.x/vim-sdk.umd.js"></script>
  ...
</head>
<body>
  ...
</body>
tip
TIP
- If you are building a multi page application, you should include the script on each page of your application, not just the main page.
- Make sure to add the
scripttag before any script code that uses VimOS.js; this ensures VimOS.js is loaded when your code uses it.
NPM
We also provide an alternative method to incorporate VimOS.js with an npm package making it easier to load and use VimOS.js as a module. Using the npm package allows you also to leverage TypeScript powerful auto-completion capabilities. When working with TypeScript in an integrated development environment (IDE) such as Visual Studio Code, the IDE can use the type information defined in VimOS.js npm package to offer auto-completion suggestions.
To use VimOS.js as a module and leverage TypeScript auto-completion capabilities, you can install it in your tech stack like this:
bash
npm install vim-os-js-browserbash
yarn add vim-os-js-browserbash
pnpm add vim-os-js-browserminimum requirements
INFO
VimOS.js TypeScript works with TypeScript V5 and above.
Asynchronous and deferred loading of VimOS.js
Asynchronous loading of JavaScript is generally recommended, as it can improve your application user experience by not blocking DOM rendering during script loading. The easiest way to asynchronously load VimOS.js is to use the npm module. It does asynchronous loading by default.
Suppose you use the script tag method to integrate VimOS.js into your code stack. In that case, we recommend not to set the async attribute in the script tag, to ensure that VimOS.js is loaded synchronously before it is called in your application code, avoiding timing issues and ensuring that VimOS.js functions as expected.
If you prefer to load VimOS.js using the async or defer attribute on the script tag, you will need to make sure that any API calls to VimOS.js are made only after the script execution is completed. You can do so by checking for the existence of vimSdk on the window:
ts
  if (window.vimSdk) {
    ...
  }
OAuth 2.0 Introduction
Vim OS Apps initialization process is based upon OAuth 2.0, an authorization framework protocol that allows a third-party website or application access to the user's protected resources.
An OAuth 2.0 flow has the following roles:
- Resource Owner: Entity that can grant access to a protected resource. In this case, the clinic.
- Resource Server: Server hosting the protected resources. This is the API you want to access. In this case, Vim OS.
- Client: Application requesting access to a protected resource. This is your App.
- Authorization Server: Server that authenticates the Resource Owner and issues access tokens after proper authorization. In this case, Vim.
OAuth 2.0 uses two endpoints: the authorize endpoint and the token endpoint.
Authorization endpoint
The https://connect.getvim.com/os-api/v1/oauth/authorize endpoint is used to interact with the resource owner and get authorization to access the protected resource.
The request parameters of the endpoint are:
| Parameter | Description |
|---|---|
| client_id | Client ID connected to your account. |
| redirect_uri | A successful response from the Authorization endpoint results in a redirect to this URL. The URL must match the base URL from your application manifest. |
| launch_id | Vim OS Application launch_id. This is provided automatically by the VimOS |
The endpoint will issue an authorization code and will pass it as part of the query params to the redirect_uri. This code will later be exchanged for an access token using the token endpoint.
Token endpoint
The application uses the https://connect.getvim.com/os-api/v1/oauth/token endpoint to obtain an access token or refresh token. The application provides the authorization code received from the authorization endpoint in exchange for an access token.
Required parameters
| Parameter | Description |
|---|---|
| client_id | Client ID connected to your account. |
| code | The authorization code from the authorization endpoint. |
| secret | Secret connected to your account. |
The Initialization sequence explained
- Launch Endpoint: When Vim OS starts the app loading process it first calls the app launch endpoint URL, provided in the Developer Console. With the correct request parameters in place, the launch endpoint must redirect to Vim's authorization endpoint.
- Authorization Server: Vim’s authorize endpoint will issue an authorization code and redirect to the provided verified
redirect_uri, which should be the App’s main page, with the authorization code as a query param in the url. - App Initialization: Your App code is loaded and should initialize a
VimOSinstance. See examples below.- The SDK uses the authorization code from the URL query param and calls your app backend token endpoint (a URL provided in the initialize method) with the authorization code.
- Your App backend should call the Vim OS token endpoint with the authorization code & the app's secret and client ID.
- The Vim OS token endpoint returns an access token that will be sent from the SDK to be verified by Vim OS.
- Secure Communication: After Vim OS verifies the access token, a secure communication channel is established and maintained between VimOS and the Application.
Implementation step by step guide
You will need to have a running app backend server, and pass the correct parameters when initializing the VimOS SDK.
Important!
TIP
To test your application, first integrate the SDK into your codebase. Next, implement the application authentication flow. Develop and test this flow in the Vim Sandbox EHR, as communication between Vim and your application requires your application to run in the Vim Hub on an EHR. When Vim injects your application iframe in the Sandbox EHR, we automatically send a request to your launch token url defined in the manifest with the launch_id.
App backend server
Your server will need to handle 2 incoming requests:
1. The launch endpoint
The launch endpoint will be called by VimOS frontend in order to issue an authorization code via Vim’s authorize endpoint.
Your launch endpoint url will:
- Receive an incoming
GETrequest with alaunch_idas a query parameter. - Redirect the call to
https://connect.getvim.com/os-api/v1/oauth/authorizewith 3 query parameters described above:launch_id,client_id,redirect_uri
2. The app token endpoint
The app token endpoint will be called by the VimOS SDK in order to exchange the authorization code with an access token via Vim’s authorize endpoint.
Your app token endpoint will:
- Receive an incoming
POSTrequest with thecodein the JSON body - Send a
POSTrequest tohttps://connect.getvim.com/os-api/v1/oauth/tokenwith thecode,client_idandsecretin the request JSON body. - Receive a JSON response with the access token.
- Reply to the incoming request with the JSON response .
Example:
js
import express from 'express';
import fetch from 'node-fetch';
import cors from 'cors';
const app = express();

// Allow incoming requests from the Vim SDK
app.use(
  cors({
    origin: [/\.getvim\.com$/],
  })
);

// It's recommended to store your account's client id and secret in environment variables
// You can find the values in your Vim account page: https://console.getvim.com/organization-admin/my-account
const clientId = process.env.CLIENT_ID;
const secret = process.env.CLIENT_SECRET;

// Replace with the actual base URL from your application manifest
const redirectUri = 'https://application-domain.com/main-app';

app.use(express.json());
app.get('/api/launch-app', (req, res) => {
  const launchId = req.query.launch_id;

  // Build the authorization URL to redirect to
  const authorizationUrl = new URL('https://connect.getvim.com/os-api/v1/oauth/authorize');
  authorizationUrl.searchParams.set("launch_id", launchId);
  authorizationUrl.searchParams.set("client_id", clientId);
  authorizationUrl.searchParams.set("redirect_uri", redirectUri);

  // Redirect the request
  res.redirect(authorizationUrl.toString());
});

app.post('/api/generate-token', async (req, res) => {
  const { code } = req.body;

  const vimResponse = await fetch('https://connect.getvim.com/os-api/v1/oauth/token', {
    method: 'POST',
    headers: { 'Content-Type': 'application/json' },
    body: JSON.stringify({ client_id: clientId, code, secret }),
  });
  const tokenData = await vimResponse.json();
  res.json(tokenData);
});
app.listen(3000, () => console.log('Server listening on port 3000'));
Initializing the VimOS SDK from your app
Initialize the SDK using an object for passing various options:
ts
const vimOS = await window.vimSdk.initializeVimSDK({
  appTokenEndpoint: 'https://app-backend-server/api/generate-token' // replace with your token generation endpoint
  // Additional options can be added here
});
// Use VimOS instance for further interactions with VimOS.js
ts
import { loadSdk } from 'vim-os-js-browser';

async function init() {
  // Initialize SDK and wait for the authentication process to complete
  const vimOS = await loadSdk({
    appTokenEndpoint: 'https://app-backend-server/api/generate-token' // replace with your token generation endpoint
    // Additional options can be added here
  });
  // Use vimOS instance for further interactions with VimOS.js
}
init();
tip
TIP
Once the SDK initialization and authentication process is complete, your application's default activation status is Disabled. This means it will appear grayed out on the Vim Hub, without an option for users to click and open the iframe. If you wish to make your application accessible, you must proactively change the activation status to Enabled.
However, we advise enabling your application only when there is tangible value for end-users to access it, to prevent user fatigue from encountering your app without immediate action or value. You can dynamically control the activation status following these instructions.
Testing the authentication flow
To help you with testing the authentication flow in a local development environment.
We have created a Postman collection that you can use to test the authentication flow.
Setup
- Have an app configured in Console
- Install Postman
- Import the Postman collection
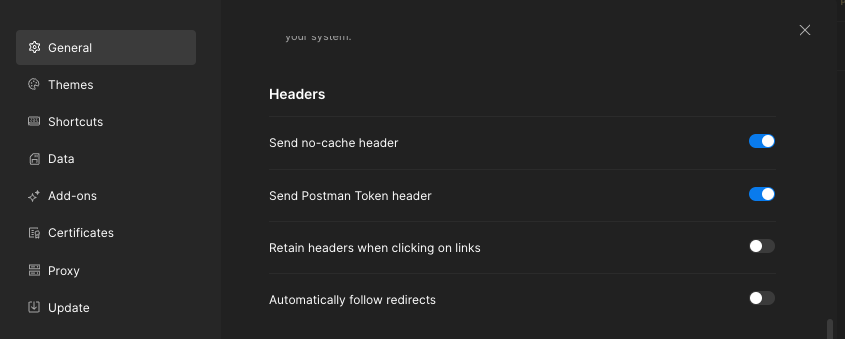
- Configure postman to not follow redirects
- Go to Settings -> General -> Headers -> Automatically follow redirects -> Turn it off
- Go to Settings -> General -> Headers -> Automatically follow redirects -> Turn it off
Steps to test the authentication flow
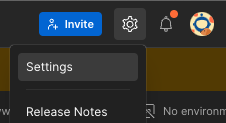
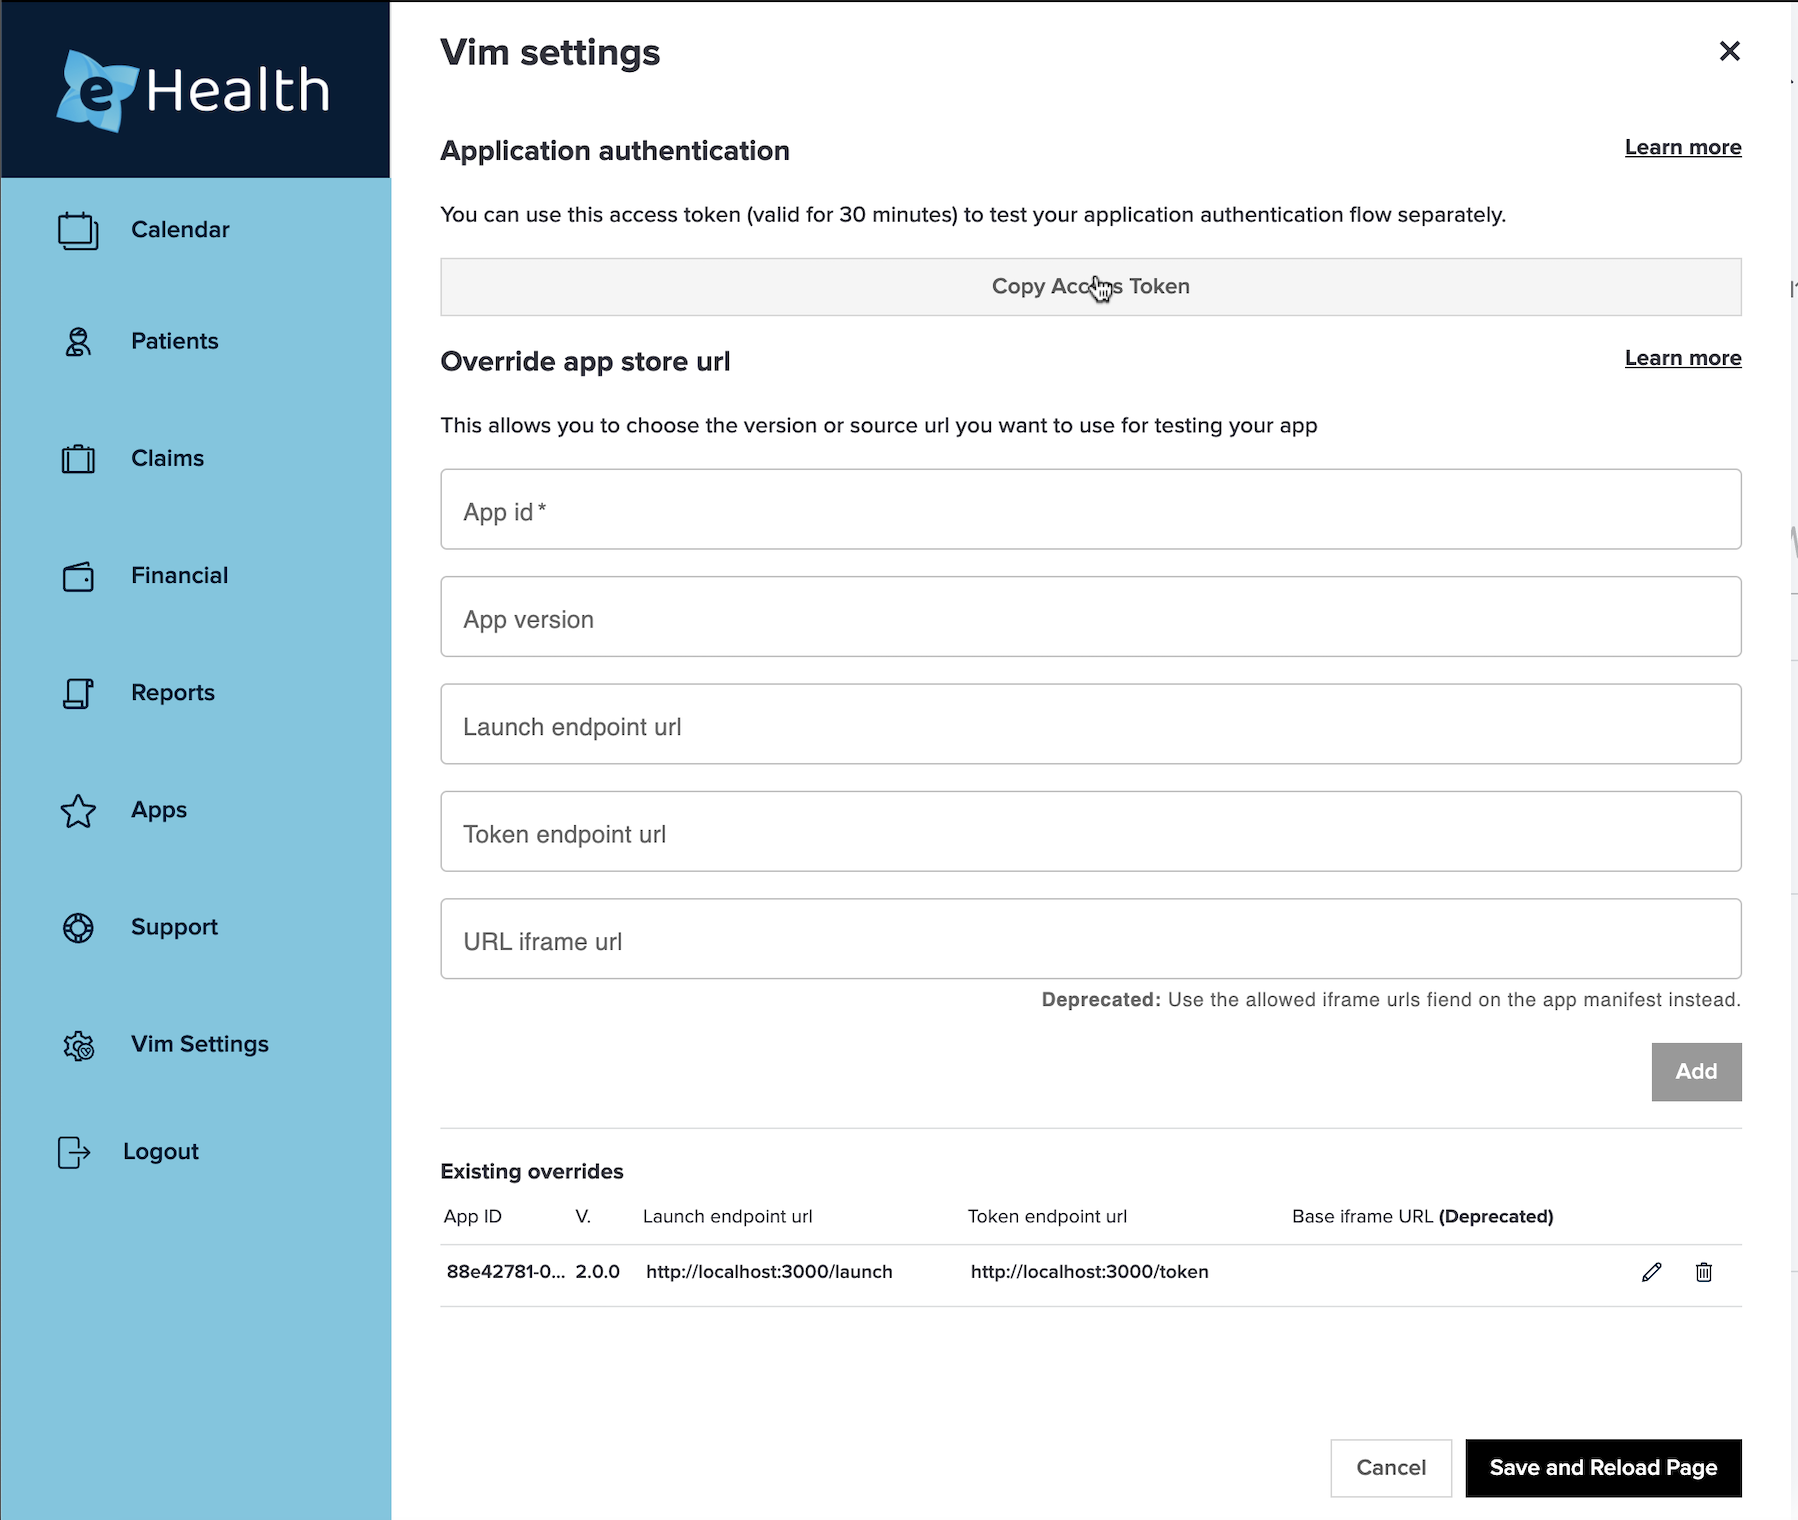
- Extract the access token from the sandbox EHR
- Open the sandbox EHR
- Go to the Vim Settings page
- Copy the access token
- Set up the environment variables in Postman
authToken: The access token from the vim settings page in the sandbox EHR- Note: The access token is only valid for 30 minutes; If you start receiving an
Authentication failedresponse from theCreate App Launch IDrequest, reload the sandbox EHR and extract a new token
- Note: The access token is only valid for 30 minutes; If you start receiving an
appId: Your app IDclientId: The client ID from your account pageclientSecret: The client Secret from your account pagelaunchEndpoint: Your backend launch endpointappTokenEndpoint: Your backend token endpoint
Be sure to save (ctrl+s) your changes to the variables; Postman doesn't auto save them.
You are not required to set the other variables, they will be auto populated by the collection logic.

- Start running the API calls in the collection.
When you run each request, some verifications are ran afterwards to verify the response is correct.
The collection also stores results in variables that are being used by the following API calls, so you should run them in the following order.Create App Launch ID- Calls Vim backend to generate the launch ID and store it as a collection variableLaunch- Calls your backend launch endpoint with the launch ID, The collection will verify the response and store the authorization code as a collection variableVim OS Authorize Endpoint- Calls Vim backend to verify the authorization request, The response should be a redirect request to your application with the authorization code as a query parameter.App Token Endpoint- Calls your backend token endpoint with the authorization code, The response should contain the access token.
In case of errors, the collection will provide you with detailed error messages.
Vim session context
vimOS.sessionContext holds information about the Vim Connect user. This information is collected as part of the User and/or Clinic onboarding process to Vim Connect, except for the EHR username.
ts
interface SessionContext {
  sessionId: string;
  user: User;
  organization: Organization;
  ehrType: string;
}
sessionId
vimOS.sessionContext.userSessionId is a unique identifier that represents a unique user session in Vim Hub. It is generated when Vim Hub loads and is refreshed each time there is a new Vim Hub session.
User
vimOS.sessionContext.user holds information about the user that is logged in to the EHR and Vim:
ts
export interface user {
  vimUserID: string;
  firstName: string;
  lastName: string;
  email: string;
  ehrUsername: string;
}
ts
const user = {
  vimUserID: 203948209842098402,
  firstName: 'John',
  lastName: 'Pisoto',
  email: '[email protected]',
  ehrUsername: 'john9328',
};
Organization
vimOS.sessionContext.organization contains details about the organization to which the currently logged-in user belongs.
ts
export interface Organization {
  id: number;
  name: string;
}
ts
const organization = {
  id: 1923,
  name: 'Medical group associates',
};
ehrType
vimOS.sessionContext.ehrType holds information about the name of the EHR the user is currently using.
ReactJS
If your application uses the React framework, you can easily wrap the VimOS.js with React like code. We recommend doing it using a Context Provider and Hooks, but you are welcome to do it in whichever way works best for you.
Context Provider
First, define a context to hold the vimOS instance
jsx
import { createContext } from 'react';

export const VimOSContext = createContext();
tsx
import { createContext } from 'react';
import { SDK } from 'vim-os-js-browser/types';

export const VimOSContext = createContext<SDK>({} as SDK);
Wrap your main component with a wrapper that will provide a VimOS instance to VimOSContext
jsx
import { useEffect, useState } from 'react';
import { VimOSContext } from './vimOSContext';

export const AppWrapper = ({children}) => {
  const [vimOS, setVimOS] = useState(undefined);
  useEffect(() => {
    (async () => {
      setVimOS(await window.vimSdk.initializeVimSDK());
    })()
  }, []);

  if (!vimOS) {
    return <div>Loading VimSDK...</div>;
  }
  return (
    <VimOSContext.Provider value={vimOS}>
      {children}
    </VimOSContext.Provider>
  )
}
jsx
import { useEffect, useState } from 'react';
import { loadSdk } from 'vim-os-js-browser';
import { VimOSContext } from './vimOSContext';

export const AppWrapper = ({ children }) => {
  const [vimOS, setVimOS] = useState(undefined);
  useEffect(() => {
    (async () => {
      setVimOS(await loadSdk());
    })();
  }, []);

  if (!vimOS) {
    return <div>Loading VimSDK...</div>;
  }
  return (
    <VimOSContext.Provider value={vimOS}>
      {children}
    </VimOSContext.Provider>
  )
}
tsx
import React, { useEffect, useState } from 'react';
import { SDK } from 'vim-os-js-browser/types';
import { loadSdk } from 'vim-os-js-browser';
import { VimOSContext } from './vimOSContext';

export const AppWrapper: React.FC = ({ children }: React.PropsWithChildren) => {
  const [vimOS, setVimOS] = useState<SDK | undefined>(undefined);
  useEffect(() => {
    (async () => {
      setVimOS(
        await loadSdk()
      );
    })();
  }, []);

  if (!vimOS) {
    return <div>Loading VimSDK...</div>;
  }
  return (
    <VimOSContext.Provider value={vimOS}>
      {children}
    </VimOSContext.Provider>
  );
};
You can now easily access the VimOS instance anywhere in your component tree. For example, here is how you can access data from the VimOS User:
jsx
import { useContext } from 'react';
import { VimOSContext } from './vimOSContext';

export const Username = () => {
  const vimOS = useContext(VimOSContext);
  const user = vimOS.sessionContext.user;
  return <div>{`${user.firstName} ${user.lastName}`}</div>
}
Custom Hooks
We will show examples for 2 use cases of Custom Hooks.
Decoupling
The simplest form of a Hook decouples the VimOS logic from the components. For example, if you don't want your components to depend on the exact path to the user object, or on the fact that you are using React Context, you can create a custom useVimOSUser Hook:
jsx
import { useContext } from 'react';
import { VimOSContext } from './vimOSContext';

export const useVimOSUser = () => {
  const vimOS = useContext(VimOSContext);
  return vimOS.sessionContext.user;
}
Your Username component will now look like this:
jsx
import { useVimOSUser } from './useVimOSUser';

export const Username = () => {
  const user = useVimOSUser();
  return <div>{`${user.firstName} ${user.lastName}`}</div>
}
Subscribe for changes
A more complex hook can subscribe to changes on the VimOS state and provide easy access to the updated data. For example, here is a hook that subscribes to EHR state changes:
jsx
import { useContext, useState } from 'react';
import { VimOSContext } from './vimOSContext';

export const useVimOSPatient = () => {
  const vimOS = useContext(VimOSContext);
  const [patient, setPatient] = useState(undefined);
  useEffect(() => {
    vimOS.ehr.subscribe('patient', setPatient);
    return () => {
      vimOS.ehr.unsubscribe('patient', setPatient);
    }
  }, [vimOS]);
  return patient;
}
tsx
import { useContext, useState } from 'react';
import { EHR } from 'vim-os-js-browser/types';
import { VimOSContext } from './vimOSContext';

export const useVimOSPatient = () => {
  const vimOS = useContext(VimOSContext);
  const [patient, setPatient] = useState<EHR.patient | undefined>(undefined);
  useEffect(() => {
    vimOS.ehr.subscribe(EHR.EHRResource.patient, setPatient);
    return () => {
      vimOS.ehr.unsubscribe(EHR.EHRResource.patient, setPatient);
    }
  }, [vimOS]);
  return patient;
}
You can now easily work with the latest patient data in your components:
jsx
import { useVimOSPatient } from './useVimOSUser';

export const PatientName = () => {
  const patient = useVimOSPatient();
  if (!patient) {
    return null;
  }
  return <div>{`${patient.demographics.firstName} ${patient.demographics.lastName}`}</div>
}
Next: Vim EHR Connectivity and Vim Hub
VimOS.js has two key features:
Vim EHR Connectivity: Vim’s EHR-Connectivity gives you the ability to not only connect to the most popular EHRs, it allows you to leverage all its existing features and functionality such as read/write access to the EHR, workflow resources and their associated data. Additionally, any new features and functionality will be made available to you automatically.
Vim Hub: Vim Hub is the Vim Connect UI, which your users will experience when working in the EHR after you have built and deployed your application. Vim designed its Vim Hub features to provide an engaging and intuitive end-user experience that reduces administrative burden.